Instagram YouTube

Handmade by Kavya

  • Home
  • Creative Resume
  • Contact Me

Hello everyone, 

Can you imagine its Fall already? Taylored Expressions has a mini fall theme release and I cannot wait to share it with you all! 

First up... we have these super adorable pumpkin pouches perfect for some candy and tiny toys! I embroidered some veins to the felt leaves and added cute tags made from Pretty Packages die set released earlier this month and newly released Tag Team - Thanksgiving. How easy is that?


Supplies Used:

Next up is my favorite stamp set from the release.. Modern Tree Stamp and Stencil Combo! This stamp set can be stretched to create cards not just for fall but for any occasion! I ended up creating two super quick birthday cards. Simply stamp the tree at different angles and color the leaves using a color combination of your choice. I used a fall combo of green, pink and yellow for one card and a classic grey, teal and pink for another. I finished both the cards by stamping sentiments from this month's free stamp and adhered them to a larger panel of Sea Salt and Toffee cardstock! 


Supplies Used:

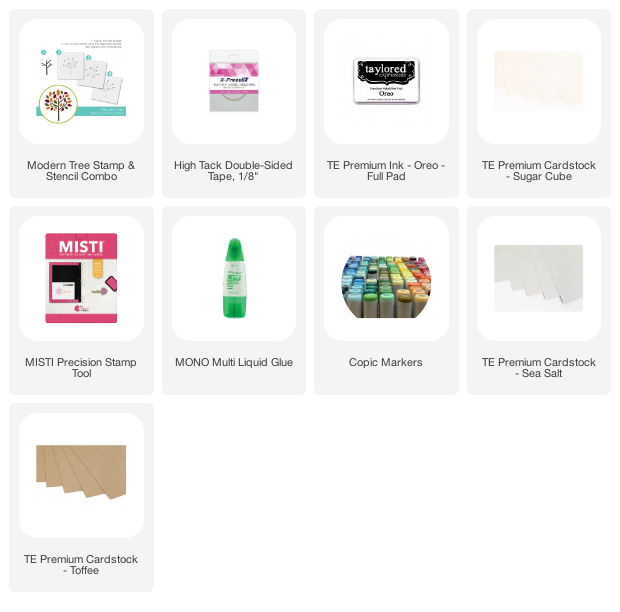
Be sure to check out other amazing cards from the rest of the team! 

Thanks for stopping by!
- Kavya
 

Share
Tweet
Pin
Share
No comments


Hi All,

I am excited to be back with another technique using some amazing Newton's Nook products! Let's change things up a bit and play with stencils this time, shall we? Stencils are super fun and can be used to create dramatic cards in a few simple steps. Here is how I created mine:

  • I decided to use some Kraft cardstock instead of my usual white for this card. I attached the card to the ---- stencil using washi tape.
  • I first ink blended using white hybrid ink. I then moved the stencil a bit and then ink blended using 4 colors to create a rainbow. I used pink, yellow, lime green, and teal hybrid inks. Adding a white layer first creates a dramatic shadow and really makes the color pop when you are using a colored cardstock! 
  • To add some extra glimmer, keeping the stencil in place from the last step, I used Tim Holtz's Nebula stickles glitter gel. I didn't like the stars so I manually removed them later on using a picking tool. 
  • I then used some outline letter dies for my sentiment. As I really liked the ink blended panel and didn't want to cover much of it, I used vellum for the center of the alphabets so that you can still see some of the rainbow gorgeousness. 
  • I then attached the panel to a larger panel using some foam. 
  • And that's about it!


I hope you liked this quick stencil card using this amazing Newton's Nook stencil. I can't believe next week is my last week already! I had so much fun sharing some cool ways to use NN's products! 

Thanks for reading, 

Kavya 

Share
Tweet
Pin
Share
No comments

Hi folks,

I am back at Crafty Meraki with another card using some MFT stamps! I just got my first set of Prismacolors and I am in love with how vibrant they are! This was such an amazing upgrade from my Faber Castell classic colored pencils.

For this card, I used MFT Double the Fun and All the Encouragement stamp sets to create this scenery. I stamped the images on Kraft card stock using black pigment ink and I then hand drew a simple jungle background and colored it in using colored pencils. Pretty simple and makes a stunning card to gift to an awesome friend! 

I hope you like it!

Hugs,

Kavya 


Share
Tweet
Pin
Share
No comments


Hi folks! 

I am back again to share a super special card! My very first entry into MFT Card Design contest. I started cardmaking less than 9 months ago and I have been waiting for this ever since. This is one of the largest cards I ever made (folded an A4 paper in half) and took me over two days to finish! I use three different coloring mediums - colored pencils, watercolors and alcohol ink markers and multiple MFT stamps and some hand-drawn elements that bring the piece together. 

Some backstory: This is a tribute to all the mothers out there that throw amazing themed birthday parties! In this card, the mama elephant is doing one for her child and its space-themed! 

This is how I put this together:
  • I used three stamp sets: MFT Space Explorers, MFT Double the Fun and MFT Happy Hippos
  • I first stamped the sentiment and hand drew the 'water burst' and the red planet.
  • I then watercolored the space backdrop and painted a hand-drawn earth 


  • I wanted to create some animal astronauts and the MFT Double the Fun and MFT Happy Hippos set was perfect for that! I drew a circle around each animal and added a band at their neck to make it look like a helmet! It's that simple. I also used a bunch of elements from space explorers and fuzzy cut all of them! This took me HOURS! I also modified the Happy Hippos set so that the hippo is actually holding a balloon of stars. This is how it looks after 1.5 days of work as I spent extensive time on details such as the helmet, planet closeups etc. 

This is the final piece of work: 


Submitting to:

Fingers crossed! 
- Kavya


Share
Tweet
Pin
Share
2 comments


Hi folks, 

I am excited to be back on the Newton's Nook blog with my second guest design post for the month. This time, I have a super cute ink blended CAS card to share. The beauty of this layout is that this can be used with most of Newton's Nook stamp sets with stand-alone images! This is my go-to technique if I want to whip up a quick card for any occasion. So, let's get started! 
  • Firstly, use some purple tape (or any tape of your choice) to mask the center portion of the panel. You can definitely get creative and try out other orientations like a diagonal, last 1/3rd of the panel, etc. You are the artist! 
  • I then used hybrid inks in three colors - baby pink, pineapple, and baby blue - to ink blend the center portion.
  • I colored the unicorn and a few other elements from Believe in Unicorns using alcohol ink markers and colored pencils. 
  • I then heat embossed the sentiment using white embossing ink and finished off the card using some clear sequins. 

Isn't that simple? I hope you liked this quick mini-tutorial. See you all next week!

Thanks,

Kavya 

Share
Tweet
Pin
Share
No comments

Hey everyone! 

I am super excited to be sharing my first release day post as DT for Taylored Expressions. This release is full of fun exciting products perfect for celebrating birthdays. This release is now available in the TE Store!

My first (and favorite) product is the Pretty Package die which is great for giving out gift cards. As the gift card slot die is separate, I decided to skip it and add a sentiment instead.


For this card, I ink blended the top of the package using Lollipop, Candy Corn, and Pineapple TE Premium ink using TE's super soft blending brushes. The 'ribbons' on the package were ink blended using Pineapple, Granny Smith, and Blue Raspberry ink. I stamped the 'confetti' image from Balloon Birthday Additions using Confetti Cake ink. I then blended the top of the panel using the same ink. The balloons from Balloon Birthday Additions were stamped using Pineapple, Lollipop, Granny Smith, and Blue Raspberry ink. I then finished off the card by stamping sentiments from Everyday Birthday, Counting Candles Add-Ons, and Millie's Birthday Bash. 


Supply List:

My next card uses the adorable life of the party set! There are so many ways to use these single animals and here is one layout. I first stamped the 'confetti' using TE's white embossing powder and then ink blended the background Cupcake, Pineapple and Confetti Cake TE ink. I then cut a semi-circle using Buttercream Frosting cardstock and then stamped sentiments from Life of the Party and Millie's Birthday Bash. I colored the cute critters using Copic markers and then placed them behind the semi-circle to finish it off!


Supply List:

My next card uses the innovative On Repeat stamp and die set. This is perfect for mass producing sentiments to make creative backgrounds. For this card, I stamped and embossed the On Repeat Birthday stamp on Pineapple, Lollipop, Blue Raspberry and Blueberry cardstock. I stamped and embossed On the Block-Happy on Earl Grey cardstock and added a black shadow so that it pops! I then arranged all the pieces on a Sea Salt panel.


Supply list:
I then used the remaining strips along with an image from Millie's Birthday Bash to create this simple yet striking birthday card! The On Repeat stamps definitely make it easier to create quick cards with endless possibilities :) 


Supply list:

My last card shows you a quick way to use the All Tucked In - Birthday stamp set. I first stamped the 'confetti' image from this set using Confetti Cake Ink and then lightly distressed the panel using Salt Water Taffy ink. The center panel was ink blended using Strawberry Milkshake, Candy Corn and Pineapple ink. I then heat embossed various sentiments from the All Tucked In stamp set to create a background and added an image colored with copics from Millie's Birthday Bash. I then finished it off with a sentiment from Tag Team Birthday on the side!  


Supply List:
 
And that's it folks! I hope you like the cards I made for the release :) I will be making a few more in the next couple of days so be sure to check out my instagram! 

Tomorrow through Sunday, September 13th you can also get our 12th Birthday Bundle for only $62. The 12th Birthday Bundle includes:

  • Bokeh Layering Stencil
  • Building Blocks – Happy Additions
  • On the Block – Happy
  • On the Block – Happy Shadow
  • On Repeat – Birthday
  • On Repeat Die
In addition, all orders receive a free I (heart) TE collector enamel pin!


Thanks,
Kavya 


Share
Tweet
Pin
Share
No comments


Hello everyone, 

I am excited to be guest designing for Newton's Nook for the month of September! Thank you Samantha for giving me this wonderful opportunity! I have four cards with totally different techniques and styles lined up for you this month! If you have been following me for a while, you would know that I don't have a signature style. I like mixing up things and trying to come up with creative ways to use my stash. I am a huge fan of Newton's Nook products as they are versatile and super cute! 

My first card uses some good old distress ink blending scene for Christmas. Here is how I put this together:
  • I distress inked my panel using Mermaid Lagoon and Cracked Pistachio. I then tried to create a snow texture by adding water and white ink splatters. 

  • I cut the winter scene landscape using my silhouette cameo but you can use a similar die of your choice.
  • I colored the images from All Aboard for Christmas using my alcohol ink markers. I like to add darker tones to my images using color pencils later on. 
  • After assembling the card, I heat embossed a sentiment on teal cardstock using white embossing powder. (PS: this actually covers up a snafu! I tried embossing directly on to the background but it didn't stand out as much and wasn't aligned properly.)
  • Voila! You are done :) 
I hope you liked this card and I can't wait to be back next week to share another style! 

Thanks,
Kavya 

Share
Tweet
Pin
Share
No comments


Hello everyone!

I am back at the Crafty Meraki blog to share yet another card with some wonderful products offered in the store. I am usually inspired by patterns and posters but this card was actually inspired by a color - Spearmint! I was swatching some new ink pads and I fell in love with this color. I have never used this color before and immediately searched for some colors to complement this beauty. After some deliberation, I settled for coral. Here is how I put this card together:
  • I ink blended the top half of my panel using a spearmint ink pad. A perfect alternative is the newly released Speckled Egg distress ink
  • I then used the largest Spellbinders Nestabilities essential rectangles etched die for the intricate dotted edge
  • I used Antique Linen Distress Ink to stamp Altenew's Statement flower and then watercolored it using Karin markers
  • I then stamped a sentiment using the same spearmint ink pad and finished it off with some clear sequins

And that's about it! I was itching to watercolor after a long time and this definitely satisfied my craving! I hope this inspires you to try out a new color combo :) 

Happy Crafting,
Kavya 

Supplies Used:
  • Altenew Statement Flower
  • Speckled Egg Distress Ink 
  • Antique Linen Distress Ink
  • Karin Markers

Share
Tweet
Pin
Share
No comments
Newer Posts
Older Posts

About me


Hello! I am Kavya. Welcome to my blog where I share my love for all things papercrafting and cardmaking. I am excited that you decided to stop by and look around.

Follow me on Social Media

  • Instagram
  • YouTube

Cards by Brand

Alex Syberia altenew Heffy Doodle Mama Elephant MFT newton's nook Pear Blossom Press Reverse Confetti SugarPea Designs Sunny Studio Stamps Taylored Expressions Wow Embossing

Blog Archive

  • ▼  2024 (11)
    • ▼  October (1)
      • Bear Hugs ft Taylored Expressions
    • ►  September (1)
    • ►  August (1)
    • ►  July (1)
    • ►  June (1)
    • ►  May (2)
    • ►  April (1)
    • ►  March (1)
    • ►  February (1)
    • ►  January (1)
  • ►  2023 (15)
    • ►  December (1)
    • ►  November (2)
    • ►  September (3)
    • ►  August (1)
    • ►  July (1)
    • ►  June (1)
    • ►  May (1)
    • ►  April (2)
    • ►  March (1)
    • ►  February (1)
    • ►  January (1)
  • ►  2022 (34)
    • ►  November (4)
    • ►  October (1)
    • ►  September (3)
    • ►  August (1)
    • ►  July (1)
    • ►  June (5)
    • ►  May (5)
    • ►  April (2)
    • ►  March (5)
    • ►  February (3)
    • ►  January (4)
  • ►  2021 (47)
    • ►  December (1)
    • ►  October (3)
    • ►  September (6)
    • ►  August (5)
    • ►  July (2)
    • ►  June (4)
    • ►  May (3)
    • ►  April (4)
    • ►  March (4)
    • ►  February (6)
    • ►  January (9)
  • ►  2020 (28)
    • ►  December (7)
    • ►  November (7)
    • ►  October (2)
    • ►  September (11)
    • ►  August (1)

Popular Posts

  • Sunny Studio Stamps 6th Birthday Blog Hop!
      Hi folks,  Welcome to the Sunny Studio Stamps 6th Birthday Blog Hop! This new release is just so much fun! If you love Christmas.. this on...
  • Sunny Studio Stamps 7th Birthday Blog Hop
      Hi folks,  I am back on the blog with another fun card! I know it's been weeks since I have posted but life's been crazy :) But, I...
  • Heffy Doodle + Sunny Studio Stamps blog hop!
    Hi folks,  Welcome to the Heffy Doodle and Sunny Studio Stamps Collaboration Blog Hop! Design Team members from both companies are sharing i...
  • New Gel Printing Kit from TE
      Hi folks,  TE has a new kit and it's all about gel printing! I have never tried it before so I was excited to get my hands on it and t...
  • You are my Best-Tea! : MFT Dec Release!
    Hi folks! I am super excited to be a part of MFT's December release! This new release has so many adorable and versatile products just l...
  • Go Cray-zy! It’s the Pear Blossom + Heffy Doodle blog hop!!
      Hi folks,  Today, we’re kicking off a CRAFTY Collaboration Blog Hop with Pear Blossom Press and Heffy Doodle !  Come hop along with us and...
  • Toy Story ft. MFT Stamps!
    Hi folks,  I am back on the blog with another fun project for MFT’s Cardmaking Superstar competition. I always love taking part in every yea...
  • Christmas Gifting Kit from TE!
      Hi folks,  TE has a new Christmas Gifting Kit that has many unique products that make packaging and decoration super adorable! As always, ...
  • TE - Happy Father's Day!
      Hi folks,  I am back on the blog with another fun release from Taylored Expressions - Father's Day! I love this release... it's so...
  • Mass produce Christmas cards easily with TE!
      Hi folks,  I am back on the blog with another fun release from TE! I love how the new Create in Quad stencils make it super easy to mass p...

Followers

Check out more cards on my Instagram here Watch Cardmaking videos on my YouTube channel here

Created with by BeautyTemplates | Distributed By Gooyaabi Templates