Instagram YouTube

Handmade by Kavya

  • Home
  • Creative Resume
  • Contact Me


Hi folks,

I spent the last few days debating if I should take part in MFT's Card Design Superstar challenge as there were so many FREAKIN AWESOME entries already but I finally decided to take part in it! This card took me over 3 days to make.. mostly because I do not own ANY coordinating dies for the stamps I used so I had to fussy cut all the images by hand! Nevertheless, I love how this turned out and this is definitely one of my fav card till date!

This card measures A4 and is meant for someone who loves to read books! In my mind, the little girl along with her 'friend'  (in the center quadrant) is envisioning all the adventures they could go on - Space, Prehistoric times, Adventures in the Sea and maybe even visit a fairytale! 

No non-MFT product was used in the making of the card. I hand drew a few images like the Earth and hand cut the basic shape of the card:


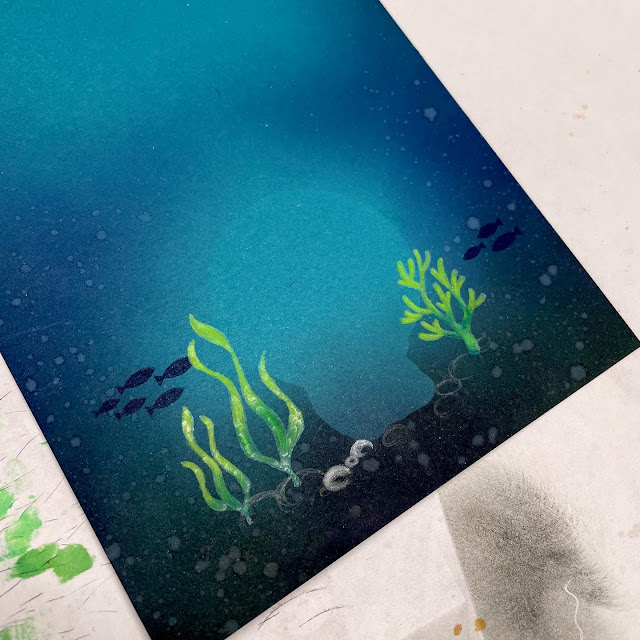
The images were all colored using Copic Markers with a white gel pen for extra details. The background for the individual quadrants were created using Distress Oxide inks. Here are more closeups of the card:


The following stamp sets were used in the creation of the card:

  • BB Our Story
  • BB Party Like a Pirate
  • BB Polynesian Paradise
  • BB Magical Dragons
  • BB Adorable Adventures
  • BB Space Explorer
  • BB Squirrel!
  • A-Roar-able Friends
  • SY Happy Campers
Check out my IG profile in a few days to see a video of this card in action! Hope you liked this entry :)

Thanks,
Kavya

Share
Tweet
Pin
Share
6 comments


Hi folks! 

I am back at Crafty Meraki with yet another card using the new MFT Frost Loving Friends stamp set! I have already showed you two other cards made using this set... this week's card uses the single bunny image from the stamp set who looks like he is ready to give a hug. Just pick non-winter colors and this card can be used all year long and not just for winter! Here is how I put this together:

  • First, I stamped the image from MFT’s Frost Loving Friends and colored it using alcohol markers and colored pencils
  • Then, I used the MFT Sending You Hugs die to partially die cut the 'Sending You'
  • Using the same die, I die cut the 'Hugs' using pink and silver glitter cardstock
  • I ink blended the heart using shades of blue and added ink splatters using white ink. I also added some stars using a white gel pen. 
  • I also stamped a sentiment from the same set using a black ink pad.
  • Finally, arrange the elements as shown below and add some sequins for extra bling!


Isn't that simple? This stamp set is truly versatile and there are so many ways to use it if you stretch your imagination! Get yours at Crafty Meraki before they are out of stock!

Thanks,
Kavya  
Share
Tweet
Pin
Share
No comments


Hi folks, 

I am back at Crafty Meraki with yet another card  using the new MFT Frost Loving Friends stamp set! Can you just tell how much I love this set? This time, I made a cool ski themed card using one of the bunnies from the set. Here is how I put this card together:

  • First, I stamped images from MFT’s Frost Loving Friends and Happy Campers and colored them using alcohol markers and colored pencils. 
  • I then ink blended the top half of the panel using shades of blue and pink dye inks. Add paint splatters to make it look like snow!
  • After adhering the images on to the inked panel, I added ‘snow’ to the stamped images using a white gel pen.
  • Finally, I stamped a sentiment from MFT’s Snow Buddies stamp set!


Wasn’t that simple? Be sure to check back next week to see yet another way to use this stamp set!

Thanks,
Kavya 


Share
Tweet
Pin
Share
No comments


Hi folks, 

I am back at Crafty Meraki with a warm winter themed card using the new MFT Frost Loving friends! I love Stacey Yacula's illustrations and this one is just adorable... This quick card uses one of the stamped images with some alpha dies to create a card perfect for a special friend. Here is how I put this card together:

  • I first distressed an A2 panel using a peach and pale pink dye ink. Any warm color works! I then splattered some white paint and ink blended using a snowflake stencil 
  • I then die cut an evergreen forest border and distressed the die cut using the same colors as the panel in order to achieve a monochromatic look!
  • I then colored the stamped image using copic markers and colored pencils
  • For the large sentiment, I die cut the letters using a rose gold glitter cardstock and then placed it on a white cardstock with a little offset so that it looks like a shadow
  • Finally, using some masking, I stamped one of the sentiments from the same set using a brown ink pad


Isn't this card just adorable? Be sure to check back for more inspiration!

Thanks,
Kavya 
Share
Tweet
Pin
Share
No comments


Hi folks!

I am super excited to be a part of MFT's December release! This new release has so many adorable and versatile products just like every single release of theirs! For my card, I was inspired by the movie 'Alice in Wonderland' and decided to create a Tea Party scene complete with Mad Hatter, Alice and a few friends using the newly released Tea Party stamp set! 


For Alice, I used the one of the girls from BB Unicorns and Glitter and masked off the unicorn horn while stamping. The attire of the girl was perfect for creating this card! I just had to add the white apron to her dress and its was complete! 


For the Mad Hatter, I ended up drawing the coat and added a tiny white card that said 10/6 to the hat! 


And that's about it! Wasn't it easy to create this card? As always, I love stretching my stamps and thoroughly enjoyed putting this card together! Be sure to check out other inspiration from MFT Friends here .

Thanks for stopping by! If you like to see more of my work, be sure to follow me on Instagram at @handmadebykavya

Best,
Kavya

Share
Tweet
Pin
Share
29 comments


Hi folks, 

I am back at Crafty Meraki with another card! This one shows you yet another way to use CM's very own slimline die - Bubble Mania. There are so many ways in which you can use this die especially with critters. Here is how I put this space themed card together:

  • I first ink blended a small square panel using black, purple, royal blue and sky blue dye inks. I then splattered some white paint and Inkon3's Liquid Pixie Dust for the stars 
  • I then die cut the slimline die using some black and white cardstock and trimmed off the excess 'bubbles'. I then used some of the bubbles from the white cardstock to color planets using colored pencils and alcohol ink markers. 
  • I then finished off the card by adding an adorable space explorer from MFT's Space Explorer and added a sentiment from CM + Heffy Doodle collab Superstar stamp set 
I hope you liked this quick and unique way to use CM's Bubble Mania Slimline die!

Thanks,
Kavya 


Share
Tweet
Pin
Share
No comments
Older Posts

About me


Hello! I am Kavya. Welcome to my blog where I share my love for all things papercrafting and cardmaking. I am excited that you decided to stop by and look around.

Follow me on Social Media

  • Instagram
  • YouTube

Cards by Brand

Alex Syberia altenew Mama Elephant MFT newton's nook Reverse Confetti SugarPea Designs Sunny Studio Stamps Taylored Expressions Wow Embossing

recent posts

Blog Archive

  • ▼  2022 (23)
    • ▼  June (4)
      • Hello Sunshine from Alex Syberia!
      • More Foiling Fun from Taylored Expressions!
      • New Summer Release from TE!
      • New Wedding products from TE!
    • ►  May (5)
    • ►  April (2)
    • ►  March (5)
    • ►  February (3)
    • ►  January (4)
  • ►  2021 (47)
    • ►  December (1)
    • ►  October (3)
    • ►  September (6)
    • ►  August (5)
    • ►  July (2)
    • ►  June (4)
    • ►  May (3)
    • ►  April (4)
    • ►  March (4)
    • ►  February (6)
    • ►  January (9)
  • ►  2020 (28)
    • ►  December (7)
    • ►  November (7)
    • ►  October (2)
    • ►  September (11)
    • ►  August (1)

Followers

Check out more cards on my Instagram here Watch Cardmaking videos on my YouTube channel here

Created with by BeautyTemplates | Distributed By Gooyaabi Templates