Instagram YouTube

Handmade by Kavya

  • Home
  • Creative Resume
  • Contact Me


Hi folks, 

The monthly kit for Taylored Expressions kit is here and it's all about cute bears that are perfect for any occasion! 

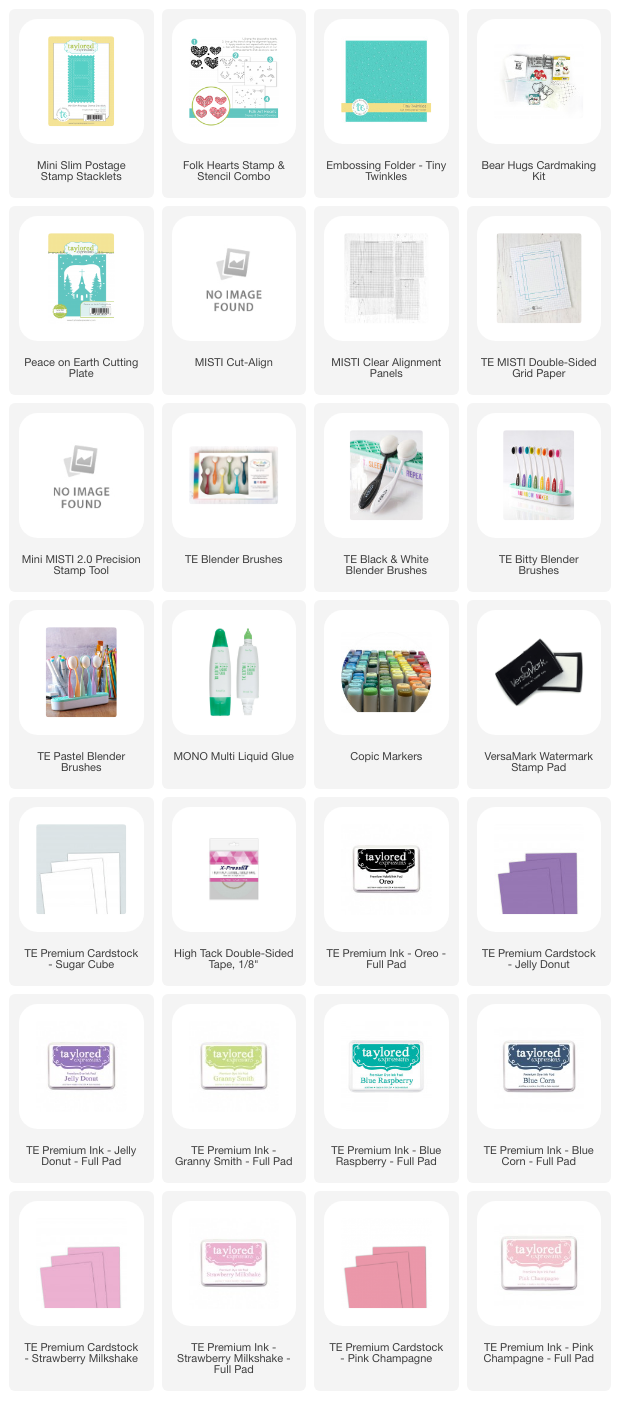
My first card is a generic card for any special friend in your life! I started off by stamping the bear and coloring it with copics. Then, for the background, I ink blended white cardstock with Blue Corn, Blue Raspberry and Granny Smith dye ink. For the forest, I die cut Peace on Earth cutting plate using Jelly Donut and ink blended the edges with coordinating dye ink. Splattered a bunch of snow and ran the background through Tiny Twinkles embossing folder to finish off my card! 


My next card is a Galentines Day card. I started off by stamping and coloring a bear from the kit. Then, I diecut a slimline postage background using Pink Champagne and Strawberry Milkshake cardstock. I ink blended the edges with coordinating dye ink. Added two folk art hearts and a sentiment to finish off my cards! 


Supply List:

Happy Crafting, 
Kavya


Share
Tweet
Pin
Share
No comments


Hi folks, 

Kavya here with a fun Christmas card using Taylored Expressions' latest release. Today's card features the new Scattered Holiday Blooms Bundle. I also have a tutorial coming up on how to create the faux frost and snow on the flowers and leaves, so be sure to check my IG tomorrow! 


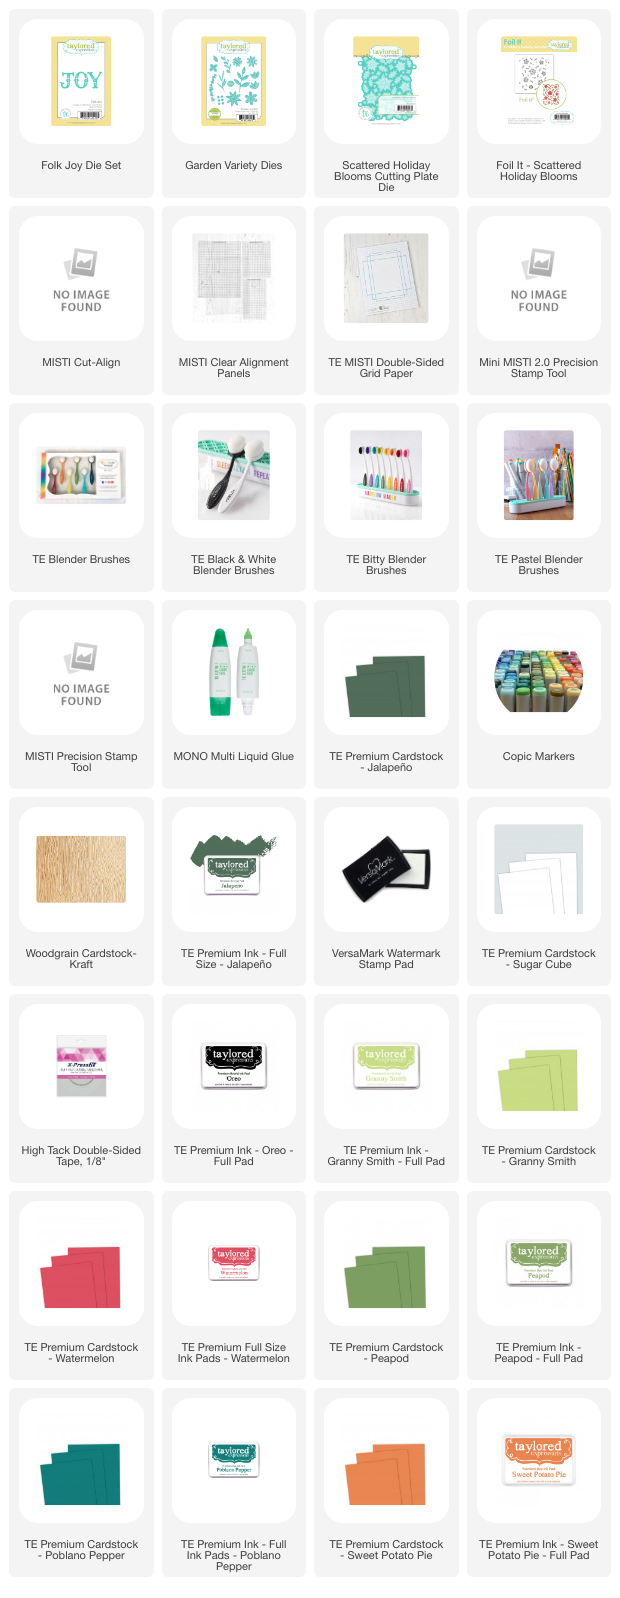
I started off ink blending Jalapeño cardstock with Jalapeño die ink. For the label, I used Jalapeño again with Kraft Woodgrain cardstock and Easy Edgers die set. I diecut the word 'Joy' out of Sugar Cube cardstock. For the flowers and leaves, I used Watermelon, Granny Smith, Peapod, Poblano Pepper and Sweet Potato Pie. As always, ink blend the edges with coordinating dye ink. Then, I applied some frost using Glossy Accents and glitter (tutorial coming tomorrow on IG!) and finished it off with some paint splatters. 


Supply List:


Love how this one turned out! 
Happy Crafting,
Kavya

Share
Tweet
Pin
Share
No comments


Hi folks, 

I am back on the blog with another fun release from Taylored Expressions! I finally took a two week break after more than 6 months and I couldn’t be happier. I am away from my craft desk spending time with family! Long story short, I forgot about the fact that the release went live yesterday. Apologies for the late post!

My first card uses the newest Spooktacular bundle. I started off by ink blending Blue Cheese cardstock with Bleu Cheese, Blue Corn, Blue Raspberry and some Jelly Donut dye inks. I stamped the background using Halloween Scene Split combo using Oreo and Blue Corn dye ink. I also splattered some paint to make the background a bit misty and night like. Then, I die cut the pumpkins using edger dies and added a few extras using the Little Bits Cauldron Confetti diecuts. As always, ink blend the die cuts with coordinating dye inks. I die cut the background using Squiggle dies and placed it on top of Oreo cardstock. Finished it off with a sentiment from Spooktacular Sentiments!


 Supply List:


My next card uses the newest Stayin Alive Bundle. I first prepped my base using Mushroom Cardstock. I ink blended an edge using Mushroom dye ink. Then, I used Blue Corn and Tropical Punch cardstock to create the house base using the Another Door Opens die. For the house roof, I used Sweet Pumpin Pie cardstock and Haunted Mansion cutting plate. Add tons of details using a white gel pen and some copic colors. Then, I heat embossed the dancing skeletons using Jelly Donut cardstock. Finished it off with a sentiment from the kit!


That’s it! I hope these projects inspire you!
Happy Crafting. 
Kavya 
Share
Tweet
Pin
Share
No comments

 
Hi folks, 

I am back with another new release from Taylored Expressions! If there were freebies that you couldn't get hold off in the past, now is your chance! I have two projects that uses some second chance products and I cannot wait to show them to you!

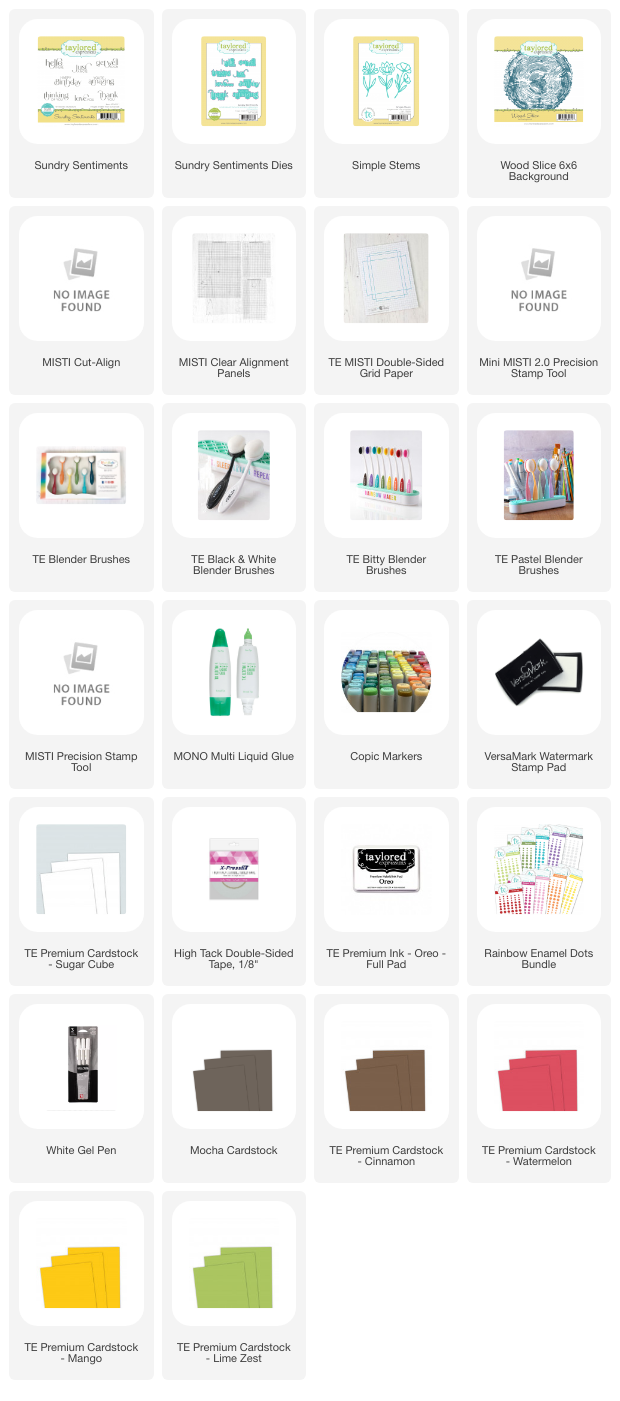
My first card uses the Simple Stems. I first diecut the flowers out of Lime Zest, Mango and Watermelon cardstock. Ink blend the edges using coordinated dye ink. Add details using an alcohol marker and white gel pen. For the background, I ink blended Mocha cardstock with Oreo dye ink. For the wood slices, I used Cinnamon cardstock and Chocolate Truffle dye ink. Go check out my IG to see how I made these faux wood slices. Then, I adhered all the elements on the Mocha cardstock and finished off the card with a sentiment from Sundry Sentiments and enamel dots!


Supply List:

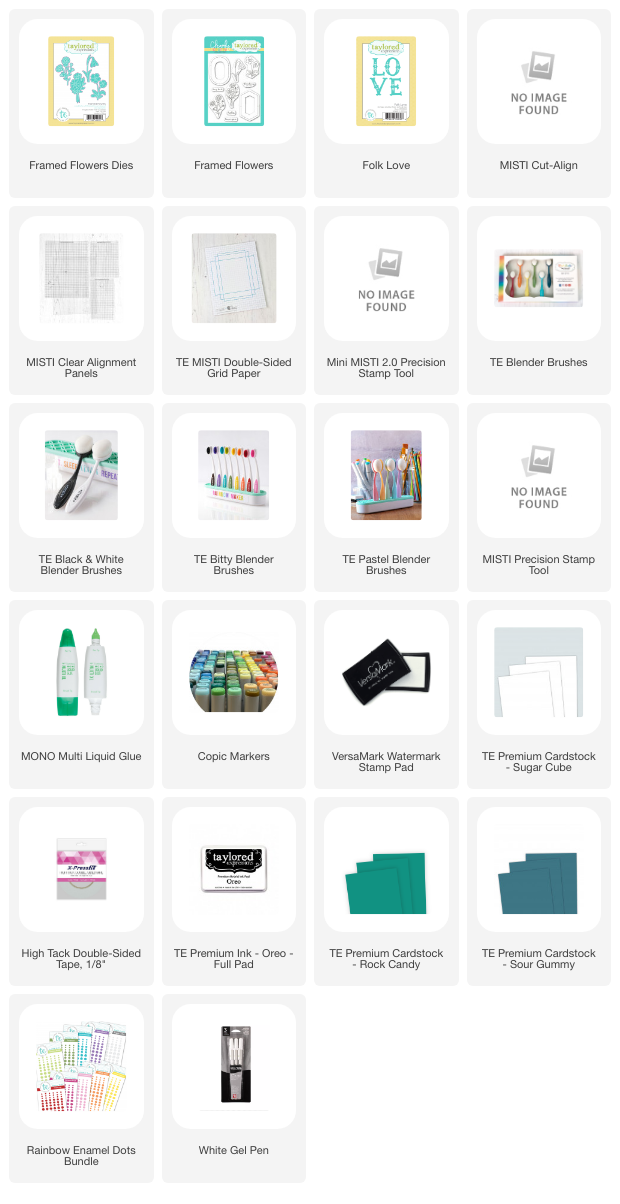
My next card uses Framed Flowers and All Planned Out 2. I started off with a Sour Gummy cardstock and some diecut Rocky Candy cardstock, both ink blended on the top with coordinating dye ink. Then, I used the Folk Love die to diecut the letters out of Sugar Cube cardstock. For the flowers, I stamped and colored them using alcohol die inks. Color the edges of the flowers with coordinating teal alcohol ink so that it looks seamless! Added a few details using a white gel pen and enamel dots to finish off my card! 


Supply List:

Hope you liked these projects!

Happy Crafting,
Kavya


Share
Tweet
Pin
Share
No comments


Hi folks, 

I am back with another spectacular release from Taylored Expressions. This week, it's all about red, white and blue!! I love how well this release pairs with all the previously released products. 

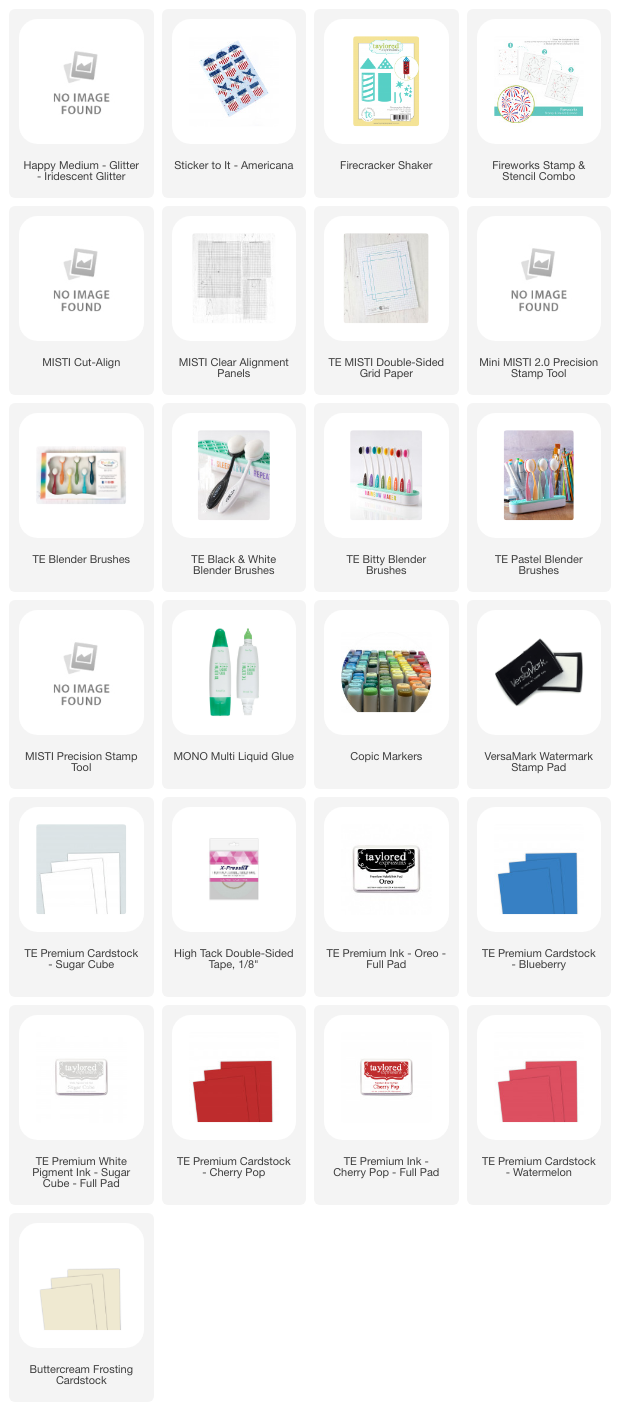
My first card features the newest Firecracker Shaker die and Sticker to it - Americana. I started off by ink blending Blueberry cardstock with Oreo dye ink. Then, I used the previously released Fireworks Stamp and Stencil Combo. I started off by stamping the stars and the first layer of the fireworks with Sugar Cube dye ink. Then, I applied Silver Happy Medium using the second fireworks stencil. For the firecracker, I used Snow Cone, Buttercream, Watermelon and Cherry Pop cardstock. I ink blended the edges using coordinating dye ink and applied details using a white gel pen. Added a sticker from the Americana set and I was done!


Supply List:


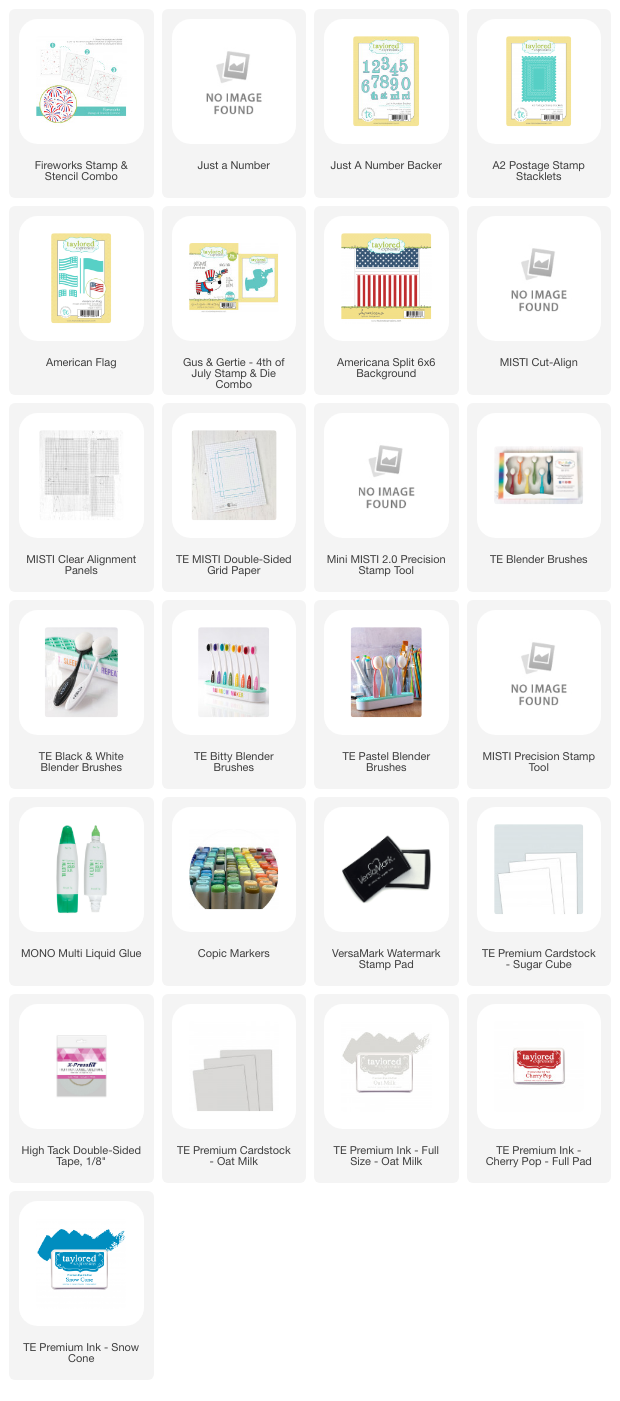
I went with some vintage vibes for my next card! I started off by stamping Americana Split background using Snow Cone dye ink and Cherry Pop dye ink. It looked a blot splotched and I liked it that way. Then, I ink blended the edges using Oat Milk to give it that vintage textured look. For the main element, I used the A2 Postage stamp stacklets with Sugar Cube and Oat Milk cardstock. I stamped the background stamp from Fireworks stamp and stencil set on the oat milk cardstock with oat milk ink. Then, I decorated the postage diecut with a colored Gus and Gertie 4th of July, American flag and Just a number diecuts. For the flag, I use cherry pop and snow cone cardstock. For the backer, I used oat milk and sugar cube cardstock. 


Supply List:

I hope those projects inspire you. 

Happy Crafting, 
Kavya 


Share
Tweet
Pin
Share
No comments


Hi folks, 

Today, we’re kicking off a CRAFTY Collaboration Blog Hop with Pear Blossom Press and Heffy Doodle !  Come hop along with us and see some awesome light-up cards!  Plus, each company will be giving away £20/$25 PRIZES!  All you have to do to be entered to win is to leave a comment at each stop along our Hop Lineup before May 29th at 11:59 PM EDT.  Winners will be announced on the Pear Blossom Press & Heffy Doodle Blogs on 5.31.24!

My card features the single light that comes with the Halo Lights and Yellow Candle Flames from from Pear Blossom Press and A Little Shellfish from Heffy Doodle. 


I started off by creating a simple background using striped pattern paper. I then cut a bunch of images from the stamp set and colored the images. Later, I die cut a the word 'Crab' and arranged all the images around the sentiment. Added the Pearblossom light and yellow candle flames to finish off my card!


Blog Hop Lineup:

  • Pear Blossom Press 
  • April Leithner
  • Amanda Fitterer
  • Kavya N ---> YOU ARE HERE
  • Natasha Davies
  • Sylvie
  • Cassie Trask
  • Heffy Doodle
Hope you liked this project!


Happy Crafting,

Kavya
Share
Tweet
Pin
Share
5 comments


Hi folks, 

I am back with another fun TE release that I am sure will solve some of your cardmaking problems - making masculine cards! There aren't enough masculine themed products in the market so I am sure you would appreciate some of the awesome products that I am going to showcase today. 

For my first card today, start by blending the edges of Mocha cardstock with Oreo dye ink. Then, stamp the new Wood Slice stamp on Cinnamon card stock with Chocolate Truffle dye ink. To make it more realistic, I tore the edges of the wood slice and ink blended the edges with Cinnamon dye ink. Then, I cute various tools from the new Tools of the Trade die set with Honey, Blue Raspberry, Oyster and Sweet Basil cardstock. I made them look a bit dimensional using alcohol markers, white gel pen details and just plain old ink blending with coordinating dye ink. Added a heat embossed sentiment from Father's Day Favorites and I was done! 


Supply List:


My next card uses the new First Drafts die set! I started off by creating my background using the new Wonky Grid stamp set. I stamped it using Jalapeno ink on Green Tea cardstock. Then, I cut various stationary products using Honey, Pineapple, Blue Raspberry, Guava, Spearmint and Buttercream frosting. For the envelope, I used Toffee cardstock with Medium Envelope die. I made them look a bit dimensional using alcohol markers, white gel pen details and just plain old ink blending with coordinating dye ink. Stamped a sentiment from Father's Day Favorites and I was done! 


Supply List:

I hope these projects inspire you!

Happy Crafting, 
Kavya


Share
Tweet
Pin
Share
No comments

 
Hi folks, 

I am back with another fun kit from TE and this one is all about my favorite style of cardmaking - typography! I am going to show you guys two cards that use these awesome large alpha dies as the focal point. The Alpha Bits Kit is $67 packaged in a zippered pouch with a custom sticker. The kit includes:

  • Tall Tales Alpha die
  • Drop Shadow Stencils
  • Bold Border Background Blocks
  • The Insiders – Alpha Bits
  • True Colors Inspiration Cards (Set of 4)
Most kit items are not available to purchase individually.

Additional products available to purchase outside of the kit: The Insiders – Alpha Bits, Alpha Bits Envelope Seals, Wavy Stitch Stacklets, and Foil It – Drop Shadow Sentiments.

Limited quantity available.


For my first project, I simply diecut a bunch of alphabets using different colors of the rainbow. I then placed them on some Oreo cardstock and added a 'Miss You' sentiment in place of the letter 'U'. Get it?
That's it! Wasn't that simple?


Supply List:

For my next card, I cut a bunch of O, U, C and H out of different shades of blue and green. This is the perfect opportunity for you to raid your scrap paper stash. I also added some borders from my stash. Then, I added a Bandaid from the Little Bits Bandaid die set and a 'Feel Better' sentiment on Oat Milk cardstock to finish off my card!


Supply List:

That's it! I hope these projects inspired you :)

Happy Crafting, 
Kavya


Share
Tweet
Pin
Share
No comments


Hi folks, 

Kavya here with some inspiration for this month's newest kit from Taylored Expressions - Scattered Blooms. This one is filled with awesome goodies - dies, stencils and foil sheets! But, I decided to try two new layouts using the dies and I love how they turned out. 

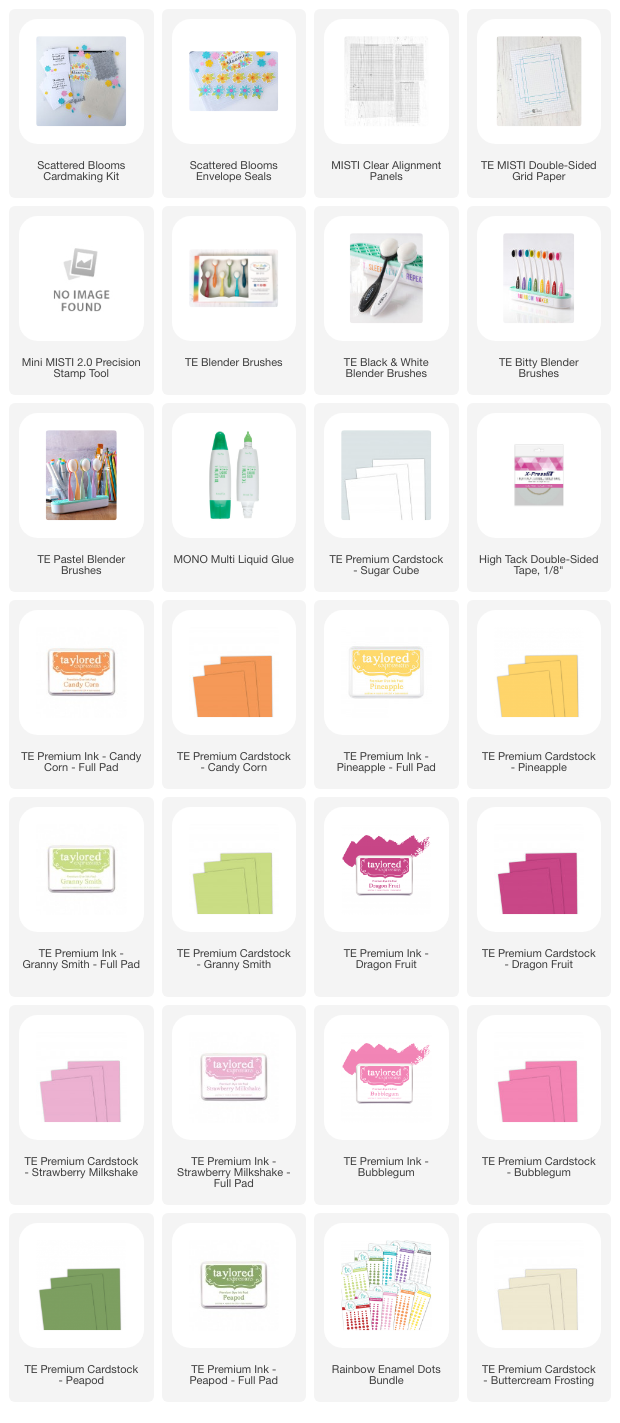
First off, die cut a bunch of flowers and leaves using the cutting plate. I used Candy Corn, Pineapple, Granny Smith, Peapod, Dragon Fruit, Bubblegum and Strawberry Milkshake.

Blue Card: 

For the Blue card, I started off by die cutting flowers again using Blue Corn cardstock. I didn't use the flowers this time around. I used the negative. I placed the negative on Tropical Punch cardstock and added some die cut Blue corn flowers. I then placed the colorful flowers and leaves all over and added some gel pen details and Enamel dots for the floral centers. I finished off my hard by adding a die cut sentiment out of Blue Corn and Buttercream frosting cardstock!


Brown Card: 

For the brown card, I die cut a bunch of 'hugs' sentiment out of Cinnamon and arranged it all over my Cinnamon card base. Then, I arranged the flowers and leaves on one corner of the card and I was done!


Supply List:

That's it! I hope this inspires you! 

Happy Crafting,
Kavya


Share
Tweet
Pin
Share
No comments


Hi folks, 

Kavya here with another fun release from Taylored Expressions! This one is absolutely adorable with a bunch of products that can be used in so many different ways!

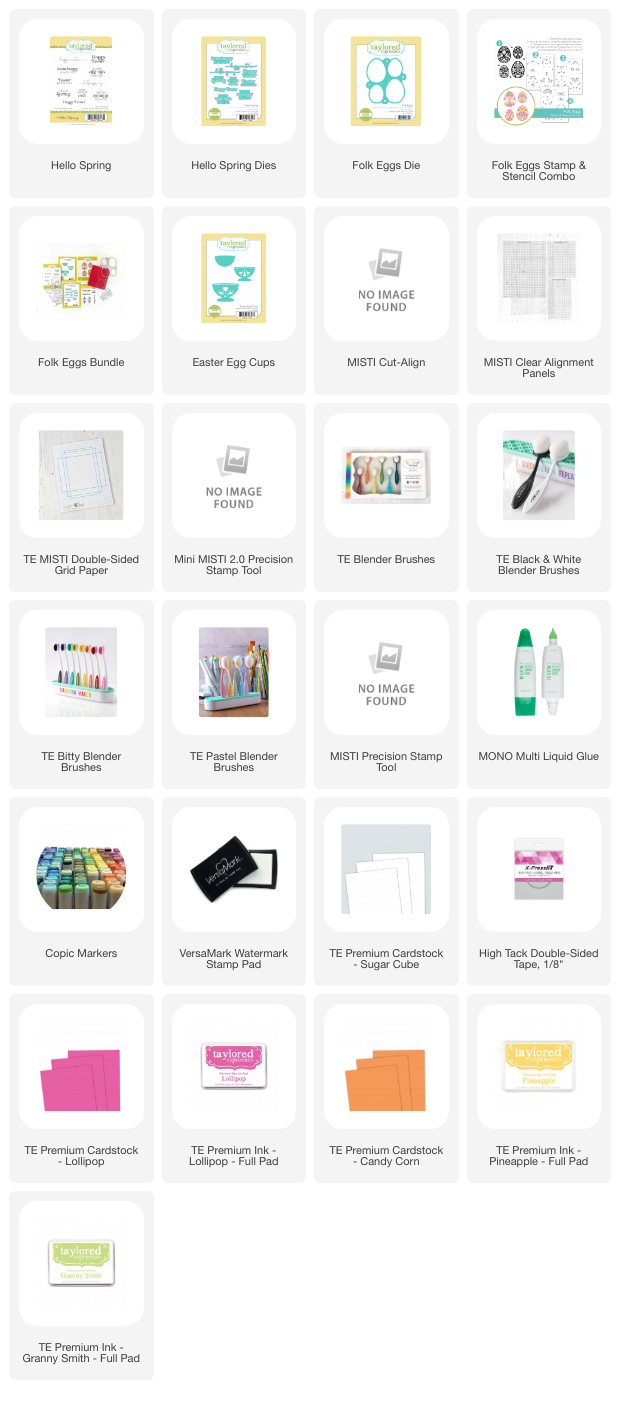
My first card is a fun Easter Egg card using Folk Eggs stamp, stencil and die set. I started off by ink blending using just the stencil from the kit on Sugar Cube cardstock. I used Pineapple, Lollipop and Granny Smith dye ink. I filled in the 'white spaces' in the egg using a pale blue Copic marker. I used Lollipop and Strawberry Milkshake cardstock to make the Easter Egg cups. For the background, I recreated a scene that made in a previous card. I finished off my card using a sentiment from the new Hello Spring stamp set and Candy Corn cardstock. 


Supply List:


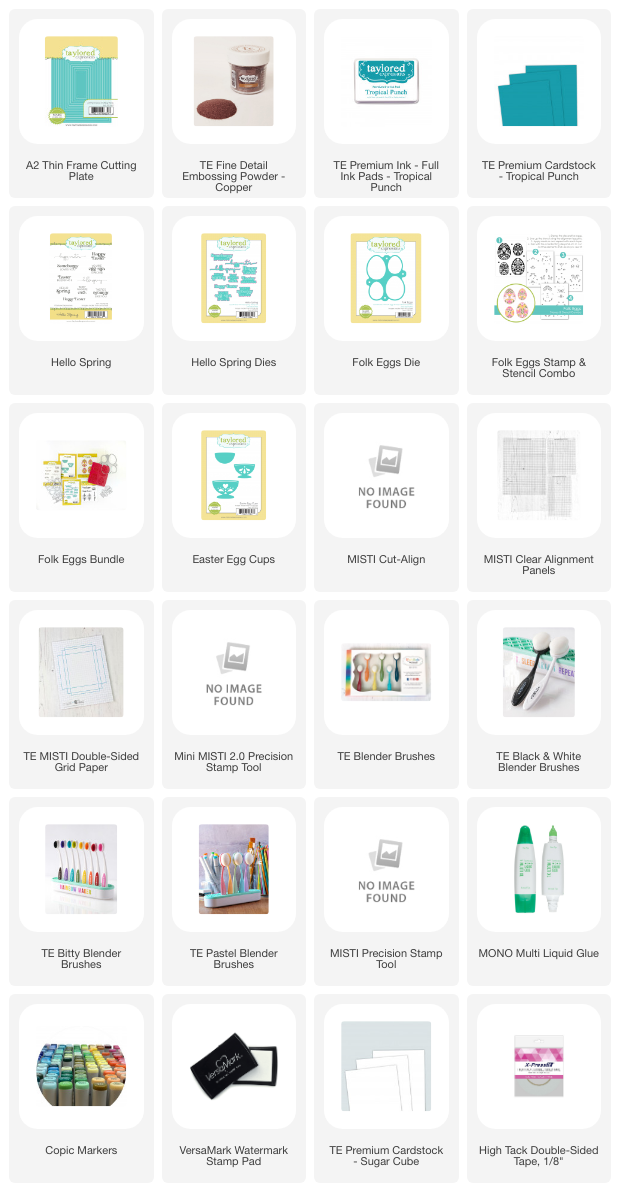
My next card is pretty simple to recreate but looks absolutely fascinating! I started off with some Tropical Punch cardstock. I then stamped some Folk Eggs using Tropical Punch ink. I then stamped a larger egg and a sentiment from Hello Spring using copper embossing powder. Cut the large embossed egg in half to insert the sentiment in between. Arrange the other eggs around the main focal egg and finish off the card by adding a thin frame!


Supply List:


That's it! I hope you like these fun projects :)

Happy Crafting,
Kavya


Share
Tweet
Pin
Share
No comments
Older Posts

About me


Hello! I am Kavya. Welcome to my blog where I share my love for all things papercrafting and cardmaking. I am excited that you decided to stop by and look around.

Follow me on Social Media

  • Instagram
  • YouTube

Cards by Brand

Alex Syberia altenew Heffy Doodle Mama Elephant MFT newton's nook Pear Blossom Press Reverse Confetti SugarPea Designs Sunny Studio Stamps Taylored Expressions Wow Embossing

Blog Archive

  • ▼  2024 (11)
    • ▼  October (1)
      • Bear Hugs ft Taylored Expressions
    • ►  September (1)
    • ►  August (1)
    • ►  July (1)
    • ►  June (1)
    • ►  May (2)
    • ►  April (1)
    • ►  March (1)
    • ►  February (1)
    • ►  January (1)
  • ►  2023 (15)
    • ►  December (1)
    • ►  November (2)
    • ►  September (3)
    • ►  August (1)
    • ►  July (1)
    • ►  June (1)
    • ►  May (1)
    • ►  April (2)
    • ►  March (1)
    • ►  February (1)
    • ►  January (1)
  • ►  2022 (34)
    • ►  November (4)
    • ►  October (1)
    • ►  September (3)
    • ►  August (1)
    • ►  July (1)
    • ►  June (5)
    • ►  May (5)
    • ►  April (2)
    • ►  March (5)
    • ►  February (3)
    • ►  January (4)
  • ►  2021 (47)
    • ►  December (1)
    • ►  October (3)
    • ►  September (6)
    • ►  August (5)
    • ►  July (2)
    • ►  June (4)
    • ►  May (3)
    • ►  April (4)
    • ►  March (4)
    • ►  February (6)
    • ►  January (9)
  • ►  2020 (28)
    • ►  December (7)
    • ►  November (7)
    • ►  October (2)
    • ►  September (11)
    • ►  August (1)

Popular Posts

  • Sunny Studio Stamps 6th Birthday Blog Hop!
      Hi folks,  Welcome to the Sunny Studio Stamps 6th Birthday Blog Hop! This new release is just so much fun! If you love Christmas.. this on...
  • Sunny Studio Stamps 7th Birthday Blog Hop
      Hi folks,  I am back on the blog with another fun card! I know it's been weeks since I have posted but life's been crazy :) But, I...
  • Heffy Doodle + Sunny Studio Stamps blog hop!
    Hi folks,  Welcome to the Heffy Doodle and Sunny Studio Stamps Collaboration Blog Hop! Design Team members from both companies are sharing i...
  • New Gel Printing Kit from TE
      Hi folks,  TE has a new kit and it's all about gel printing! I have never tried it before so I was excited to get my hands on it and t...
  • You are my Best-Tea! : MFT Dec Release!
    Hi folks! I am super excited to be a part of MFT's December release! This new release has so many adorable and versatile products just l...
  • Go Cray-zy! It’s the Pear Blossom + Heffy Doodle blog hop!!
      Hi folks,  Today, we’re kicking off a CRAFTY Collaboration Blog Hop with Pear Blossom Press and Heffy Doodle !  Come hop along with us and...
  • Toy Story ft. MFT Stamps!
    Hi folks,  I am back on the blog with another fun project for MFT’s Cardmaking Superstar competition. I always love taking part in every yea...
  • Christmas Gifting Kit from TE!
      Hi folks,  TE has a new Christmas Gifting Kit that has many unique products that make packaging and decoration super adorable! As always, ...
  • TE - Happy Father's Day!
      Hi folks,  I am back on the blog with another fun release from Taylored Expressions - Father's Day! I love this release... it's so...
  • Mass produce Christmas cards easily with TE!
      Hi folks,  I am back on the blog with another fun release from TE! I love how the new Create in Quad stencils make it super easy to mass p...

Followers

Check out more cards on my Instagram here Watch Cardmaking videos on my YouTube channel here

Created with by BeautyTemplates | Distributed By Gooyaabi Templates