Instagram

Handmade by Kavya

  • Home
  • Contact Me
  • Downloads
    • Lettering
    • Illustrations


Hi folks! 

I am back again to share a super special card! My very first entry into MFT Card Design contest. I started cardmaking less than 9 months ago and I have been waiting for this ever since. This is one of the largest cards I ever made (folded an A4 paper in half) and took me over two days to finish! I use three different coloring mediums - colored pencils, watercolors and alcohol ink markers and multiple MFT stamps and some hand-drawn elements that bring the piece together. 

Some backstory: This is a tribute to all the mothers out there that throw amazing themed birthday parties! In this card, the mama elephant is doing one for her child and its space-themed! 

This is how I put this together:
  • I used three stamp sets: MFT Space Explorers, MFT Double the Fun and MFT Happy Hippos
  • I first stamped the sentiment and hand drew the 'water burst' and the red planet.
  • I then watercolored the space backdrop and painted a hand-drawn earth 


  • I wanted to create some animal astronauts and the MFT Double the Fun and MFT Happy Hippos set was perfect for that! I drew a circle around each animal and added a band at their neck to make it look like a helmet! It's that simple. I also used a bunch of elements from space explorers and fuzzy cut all of them! This took me HOURS! I also modified the Happy Hippos set so that the hippo is actually holding a balloon of stars. This is how it looks after 1.5 days of work as I spent extensive time on details such as the helmet, planet closeups etc. 

This is the final piece of work: 


Submitting to:

Fingers crossed! 
- Kavya


Share
Tweet
Pin
Share
2 comments


Hi folks, 

I am excited to be back on the Newton's Nook blog with my second guest design post for the month. This time, I have a super cute ink blended CAS card to share. The beauty of this layout is that this can be used with most of Newton's Nook stamp sets with stand-alone images! This is my go-to technique if I want to whip up a quick card for any occasion. So, let's get started! 
  • Firstly, use some purple tape (or any tape of your choice) to mask the center portion of the panel. You can definitely get creative and try out other orientations like a diagonal, last 1/3rd of the panel, etc. You are the artist! 
  • I then used hybrid inks in three colors - baby pink, pineapple, and baby blue - to ink blend the center portion.
  • I colored the unicorn and a few other elements from Believe in Unicorns using alcohol ink markers and colored pencils. 
  • I then heat embossed the sentiment using white embossing ink and finished off the card using some clear sequins. 

Isn't that simple? I hope you liked this quick mini-tutorial. See you all next week!

Thanks,

Kavya 

Share
Tweet
Pin
Share
No comments


Hey folks, 

I am back at Crafty Meraki sharing another card... non-floral this time! I fell in love with Hero Arts Hello Toucan stamp set as it was complete with tropical plants and flowers. I combined it with a sentiment from MFT Double the Fun to make a card perfect for your loved one! Here is how I put this together:

  • I first started with a panel of dark green cardstock and distressed it with shades of green like evergreen borough and peacock feathers. I didn't use a smooth cardstock so it looks a bit splotchy but I think I like the texture! 
  • I then stamped a bunch of tropical flowers and leaves along with two toucans. I colored the images using Copic markers and colored pencils. I tried to differentiate the female and male toucan by the color of their beaks and added purple highlights to the body of the female toucan.
  • I also distressed two heart die-cuts (one a bit larger than the other) and used this as a guide to arrange the stamped embellishments. I added foam underneath the smaller heart to give it some more dimension. 
  • I then finished it off by heat embossing a sentiment from MFT's Double the Fun and add some clear drops using Nuvo Crystal drops. 

That's all folks! I hope you liked the card and can't wait to see what you can create using this versatile set! I will be back next week with another card made using the same set!

Stay safe and happy crafting!

Share
Tweet
Pin
Share
No comments

Hey everyone! 

I am super excited to be sharing my first release day post as DT for Taylored Expressions. This release is full of fun exciting products perfect for celebrating birthdays. This release is now available in the TE Store!

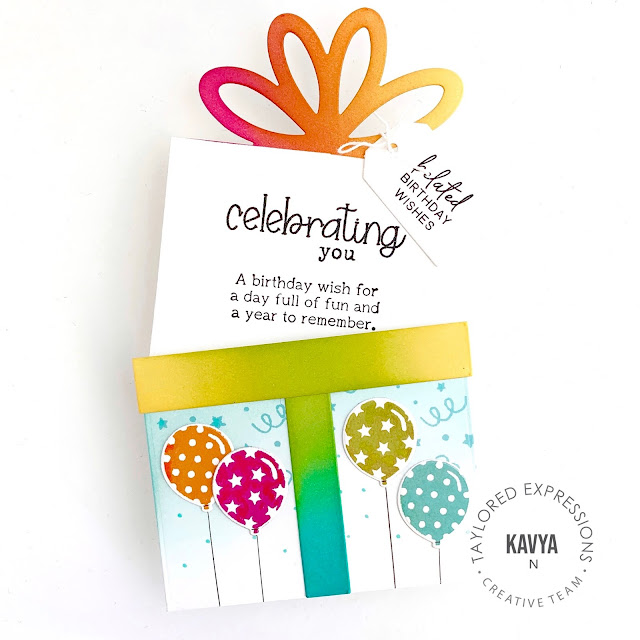
My first (and favorite) product is the Pretty Package die which is great for giving out gift cards. As the gift card slot die is separate, I decided to skip it and add a sentiment instead.


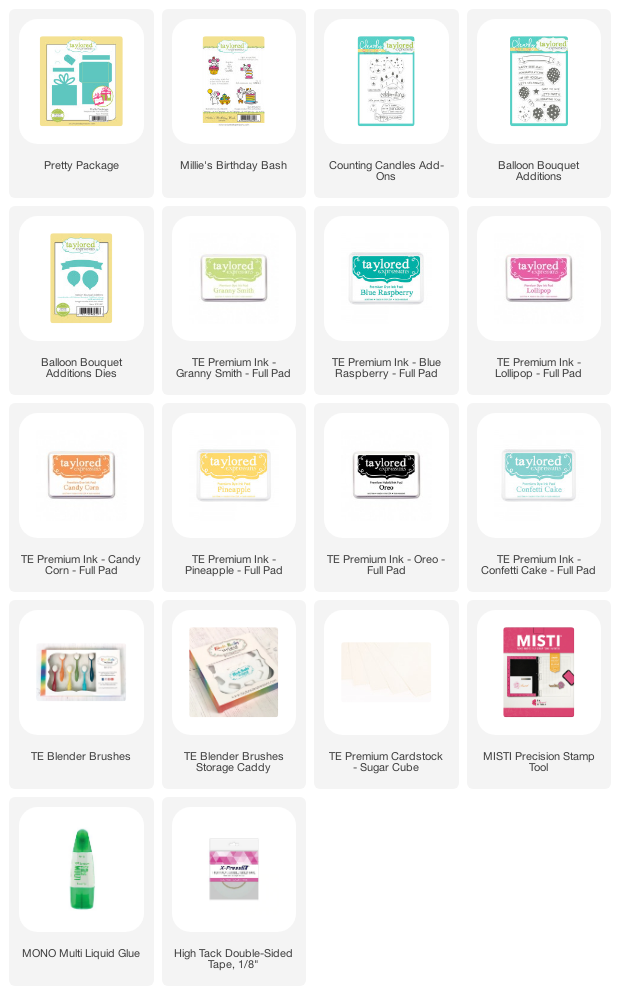
For this card, I ink blended the top of the package using Lollipop, Candy Corn, and Pineapple TE Premium ink using TE's super soft blending brushes. The 'ribbons' on the package were ink blended using Pineapple, Granny Smith, and Blue Raspberry ink. I stamped the 'confetti' image from Balloon Birthday Additions using Confetti Cake ink. I then blended the top of the panel using the same ink. The balloons from Balloon Birthday Additions were stamped using Pineapple, Lollipop, Granny Smith, and Blue Raspberry ink. I then finished off the card by stamping sentiments from Everyday Birthday, Counting Candles Add-Ons, and Millie's Birthday Bash. 


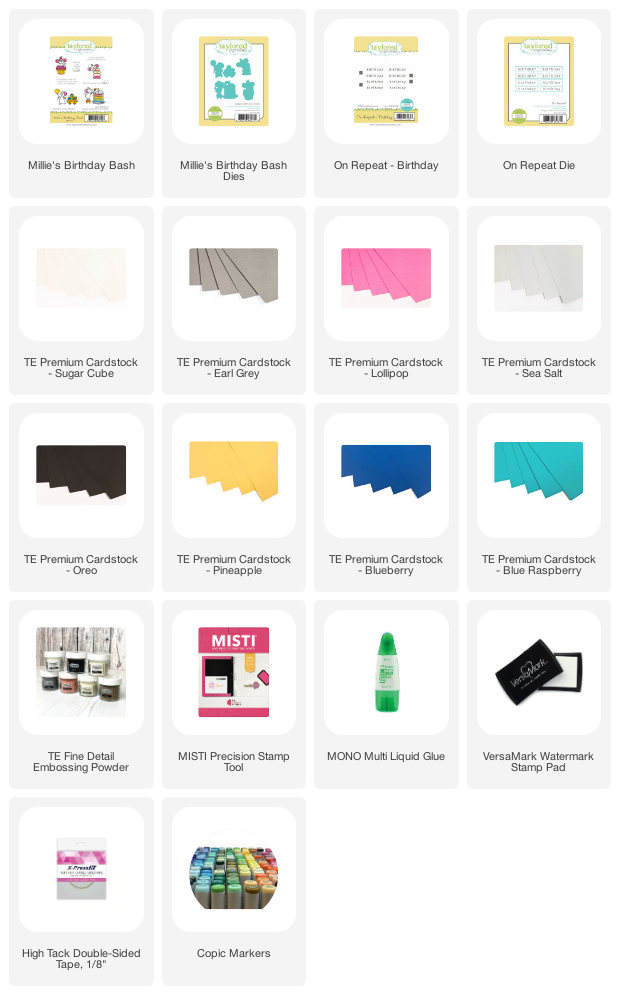
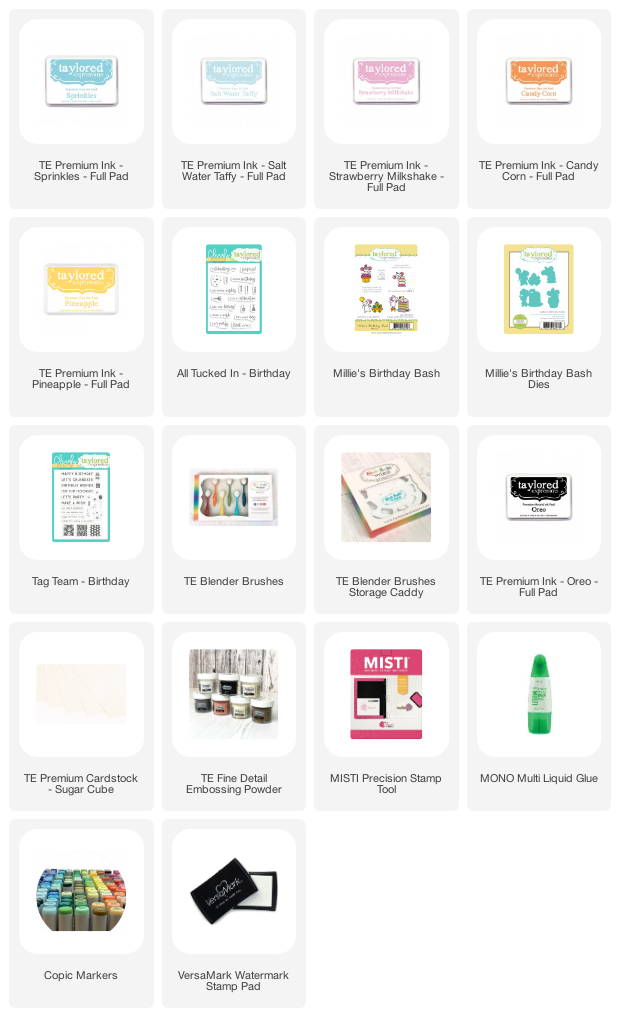
Supply List:

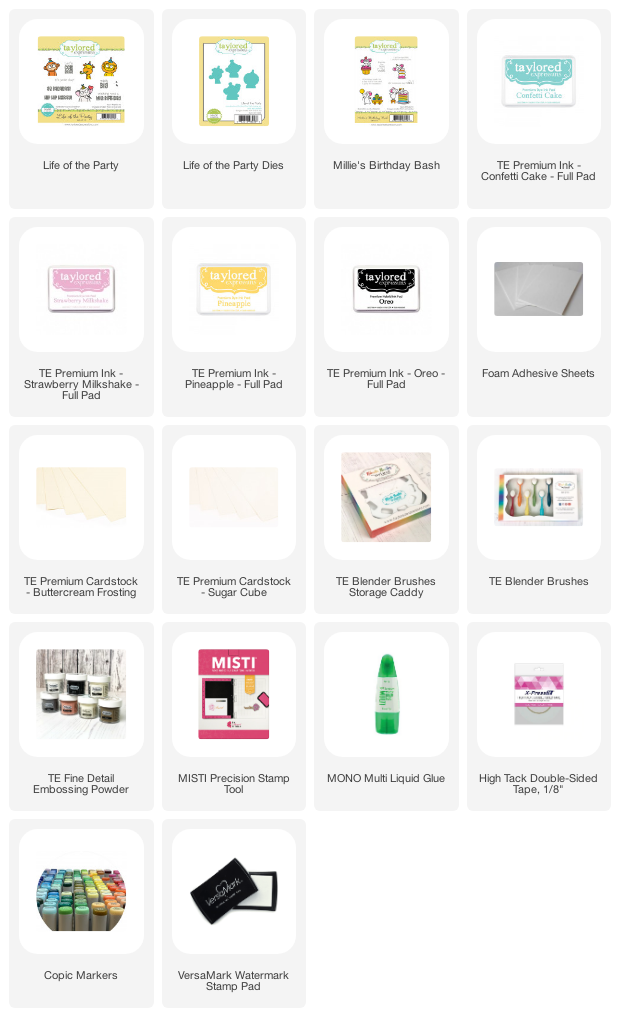
My next card uses the adorable life of the party set! There are so many ways to use these single animals and here is one layout. I first stamped the 'confetti' using TE's white embossing powder and then ink blended the background Cupcake, Pineapple and Confetti Cake TE ink. I then cut a semi-circle using Buttercream Frosting cardstock and then stamped sentiments from Life of the Party and Millie's Birthday Bash. I colored the cute critters using Copic markers and then placed them behind the semi-circle to finish it off!


Supply List:

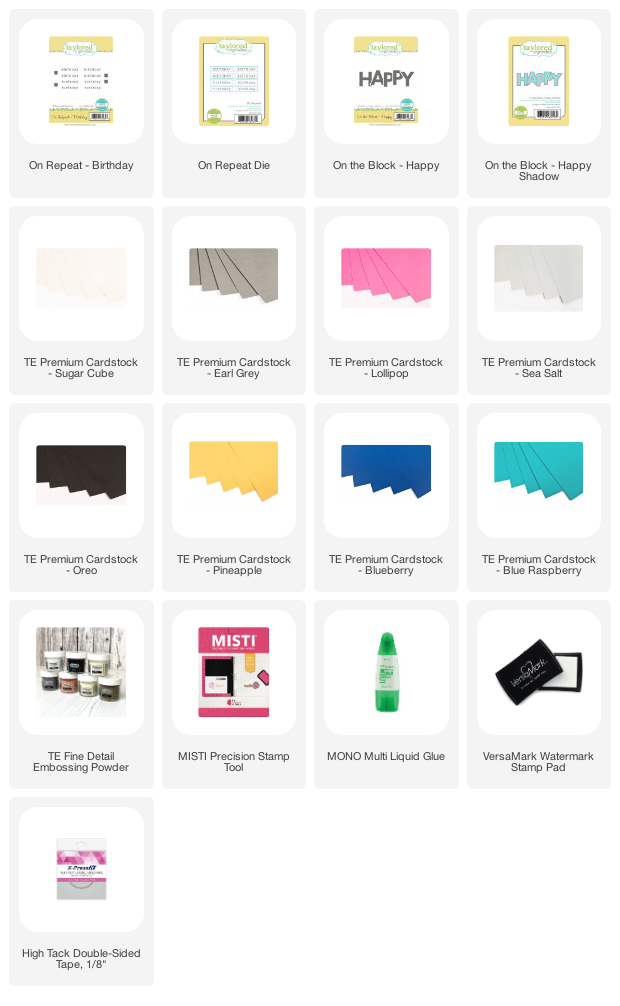
My next card uses the innovative On Repeat stamp and die set. This is perfect for mass producing sentiments to make creative backgrounds. For this card, I stamped and embossed the On Repeat Birthday stamp on Pineapple, Lollipop, Blue Raspberry and Blueberry cardstock. I stamped and embossed On the Block-Happy on Earl Grey cardstock and added a black shadow so that it pops! I then arranged all the pieces on a Sea Salt panel.


Supply list:
I then used the remaining strips along with an image from Millie's Birthday Bash to create this simple yet striking birthday card! The On Repeat stamps definitely make it easier to create quick cards with endless possibilities :) 


Supply list:

My last card shows you a quick way to use the All Tucked In - Birthday stamp set. I first stamped the 'confetti' image from this set using Confetti Cake Ink and then lightly distressed the panel using Salt Water Taffy ink. The center panel was ink blended using Strawberry Milkshake, Candy Corn and Pineapple ink. I then heat embossed various sentiments from the All Tucked In stamp set to create a background and added an image colored with copics from Millie's Birthday Bash. I then finished it off with a sentiment from Tag Team Birthday on the side!  


Supply List:
 
And that's it folks! I hope you like the cards I made for the release :) I will be making a few more in the next couple of days so be sure to check out my instagram! 

Tomorrow through Sunday, September 13th you can also get our 12th Birthday Bundle for only $62. The 12th Birthday Bundle includes:

  • Bokeh Layering Stencil
  • Building Blocks – Happy Additions
  • On the Block – Happy
  • On the Block – Happy Shadow
  • On Repeat – Birthday
  • On Repeat Die
In addition, all orders receive a free I (heart) TE collector enamel pin!


Thanks,
Kavya 


Share
Tweet
Pin
Share
No comments


Hello everyone, 

I am excited to be guest designing for Newton's Nook for the month of September! Thank you Samantha for giving me this wonderful opportunity! I have four cards with totally different techniques and styles lined up for you this month! If you have been following me for a while, you would know that I don't have a signature style. I like mixing up things and trying to come up with creative ways to use my stash. I am a huge fan of Newton's Nook products as they are versatile and super cute! 

My first card uses some good old distress ink blending scene for Christmas. Here is how I put this together:
  • I distress inked my panel using Mermaid Lagoon and Cracked Pistachio. I then tried to create a snow texture by adding water and white ink splatters. 

  • I cut the winter scene landscape using my silhouette cameo but you can use a similar die of your choice.
  • I colored the images from All Aboard for Christmas using my alcohol ink markers. I like to add darker tones to my images using color pencils later on. 
  • After assembling the card, I heat embossed a sentiment on teal cardstock using white embossing powder. (PS: this actually covers up a snafu! I tried embossing directly on to the background but it didn't stand out as much and wasn't aligned properly.)
  • Voila! You are done :) 
I hope you liked this card and I can't wait to be back next week to share another style! 

Thanks,
Kavya 
Share
Tweet
Pin
Share
No comments


Hello everyone!

I am back at the Crafty Meraki blog to share yet another card with some wonderful products offered in the store. I am usually inspired by patterns and posters but this card was actually inspired by a color - Spearmint! I was swatching some new ink pads and I fell in love with this color. I have never used this color before and immediately searched for some colors to complement this beauty. After some deliberation, I settled for coral. Here is how I put this card together:
  • I ink blended the top half of my panel using a spearmint ink pad. A perfect alternative is the newly released Speckled Egg distress ink
  • I then used the largest Spellbinders Nestabilities essential rectangles etched die for the intricate dotted edge
  • I used Antique Linen Distress Ink to stamp Altenew's Statement flower and then watercolored it using Karin markers
  • I then stamped a sentiment using the same spearmint ink pad and finished it off with some clear sequins

And that's about it! I was itching to watercolor after a long time and this definitely satisfied my craving! I hope this inspires you to try out a new color combo :) 

Happy Crafting,
Kavya 

Supplies Used:
  • Altenew Statement Flower
  • Speckled Egg Distress Ink 
  • Antique Linen Distress Ink
  • Karin Markers

Share
Tweet
Pin
Share
No comments

Hi, 

I am super excited to share that I am a guest designer for WOW's collaborative blog hop with Kat Scrappiness! Welcome to the WOW! Embossing Powder & Kat Scrappiness Blog Hop! We have TWO days of inspiration for you using Kat Scrappiness Stamps, Dies, and Embellishments and WOW! Embossing Powders. And of course there are amazing PRIZES! 

WOW! Embossing Powders is giving away a $25 Gift Certificate to either their UK or USA Store and Kat Scrappiness is giving away a $25 Gift Certificate to their store. All you need to do to win is COMMENT. The more blogs you comment on the more chances you have to win! The winners will be chosen at RANDOM from ANY of the blogs on the two day hop. You have come here from Verity Biddlecombe ..... Next, on the Hop is Meghan Kennihan! If you get lost along the way, here are the lineups for both days! 

Day 1:
Kat Scrappiness 
Jo Thompson 
Daniel Diaz 
Kathy Schweinfurth 
Ericka Strange 
Maria Russell
Riikka Kovasin 
Tina Guigui Dornbaum 
Karen Reategui 
Priscilla Bergman Joseph
Isha Gupta  
Martha Lucia Gomez 

Day 2:

WOW! Embossing Powder 
Erica AB Andersson 
Jo Herbert
Ashlee McGregor 
Lisa Schneider 
Caren Bartholomew 
Natasha Davies 
Waleska Galindo 
Verity Biddlecombe 
Kavya N   ------ YOU ARE HERE! 
Meghan Kennihan ----- NEXT!
Sandra Beus
Adam Karle


For this hop, I wanted to create something that used embossing in various ways! I used the magnificent  Floral Heart Die from Kat Scrappiness and heat embossed the first layer using Midnight Dream, Totally Teal and Lime Ricky embossing powders. I added a black shadow using a marker for the second layer and some Midas Touch for the third. Here is how adding multiple layers makes the first layer pop! I then adhered to an embossed panel to finish it off! 

I love how this card turned out! If you are new to my work, be sure to check out my instagram (@handmadebykavya)  for more of my work. I usually don't post all my works on my blog :) 

Thank you so much for stopping by!
Kavya 


Share
Tweet
Pin
Share
20 comments
Hi!

I hope everyone is safe and sound! I am back with yet another way to use Newton Nook's Flower Garden stamp set without having to create elaborate backgrounds. I like stamp sets that are versatile and have endless uses and this one is definitely one of them! When I first got the stamp set, I liked how the cat formed a perfect '0' with the flower bed. This image can be used in countless ways as a substitute for the alphabet 'O' or the number '0'! Here is one such way I used the image:
  • Create a background by blending Distress inks of your choice. I used Dried Marigold and Antique Linen
  • For some drama, I decided the stamp Newton's Nook Birthday Roundabout twice on the lighter side of my ink blended background. I used Dried Marigold distress ink to stamp so that the image blends with the background
  • Color the stamped image and cut out words using an alphabet die of your choice. I used my silhouette cameo to cut out the letters 'M' and "G'. 
  • I then finished off the card by stamping some sentiments from the same Roundabout stamp set using Versamark ink and WOW White embossing powder. 

That's all there is to create this cute little card! You could use this exact same image to create the words 'love' and 'you' and birthday/anniversary cards by using the image as a '0'. Can't wait to see what you all create!

Happy Crafting, 
Kavya 

Supplies Used:
  • Newton's Nook Flower Garden
  • Newton's Nook Birthday Roundabout
  • Distress Inks - Dried Marigold, Antique Linen

Share
Tweet
Pin
Share
No comments


Hey folks! 

I am back with another post at Crafty Meraki blog with another way to use those cute critters without having to create a detailed background. This is my go-to technique when I don't feel like blending or coloring a lot. 


For this card, I created two mini-oval windows using nesting dies. Crafty Meraki has a wide range of frame dies if you prefer something fancier! I then ink-blended the inside of each frame using distress inks splattered some white paint for a subtle background. After stamping the sentiments and placing the critters using some double-sided foam tape, I decided to use my white Sakura gelly roll pen to add a border to the card. 

And there you go! A super simple quick card without having to worry about creating a background or figuring out where to place the critters! 

Happy Crafting,
Kavya

Supplies Used:
  • Newton's Nook Flower Garden
  • Distress Inks: Mowed Lawn, Mermaid Lagoon, Abandoned Coral, Spiced Marmalade


Share
Tweet
Pin
Share
No comments


Hey folks! 

Today's card shows yet another way to use the MFT's Corner Blooms stamp available at Crafty Meraki.  Here's how I made this card:
  • First, stamp the image on some 110lb cardstock
  • Cut one 'arm' of the corner blooms stamp (I decided to cut the one with two smaller flowers/the one placed on the right side of the heart)
  • Add a stem to the main flower and color the image using alcohol ink marker
  • For the background, blend the bottom half of the panel using Antique Linen distress ink. Then, heat emboss the MFT Harmonius Hibiscus background using a pearl gold embossing powder of your choice
  • Add a sentiment and embellishments of your choice to finish it up! I used a sentiment from MFT Flower Fairies stamp set available at Crafty Meraki and some holographic clear sequins


And you are done :) I hope you enjoyed these creative ways to use a corner stamp!

Thanks,
Kavya

Supplies used:
  • Floral Stamp: MFT Corner Blooms, MFT Harmonious Hibiscus Background
  • Sentiment: MFT Flower Fairies
  • Distress Inks for blending: Ranger Tim Holtz Mini Distress Ink Pads - Antique Linen


Share
Tweet
Pin
Share
No comments


Hey folks! 

I hope everyone is safe and sound! Today's card uses MFT's Corner Blooms stamp available at Crafty Meraki to create a heart as a focal image. Yup, you don't have to use corner stamps for just corners anymore! With few alterations, this floral stamp proves to be a versatile addition to your craft stash. Here's how I made this card:
  • First, stamp the image on some 110lb cardstock and color using alcohol ink markers
  • Die cut a heart from pale gray cardstock and ink blend the edges using various shades of green
  • Cut one 'arm' of the corner blooms stamp (I decided to cut the one with two smaller flowers/the one placed on the right side of the heart)
  • Place the fuzzy cut pieces as follows (feel free to cut the leaves as well and place them wherever you desire!):
  • Add a sentiment and embellishments of your choice to finish it up! I used a sentiment from MFT Flower Fairies stamp set available at Crafty Meraki and some holographic clear sequins
  • For the background, dry emboss the panel using an embossing folder of your choice and mat it on a slightly larger piece of green cardstock to add some dimension! 


Voila! You are done :) I hope you enjoyed this quick and short tutorial. I will be back in a few days with yet another way to use the corner blooms stamp from MFT!

Thanks,
Kavya

Supplies used:
  • Floral Stamp: MFT Corner Blooms
  • Sentiment: MFT Flower Fairies
  • Distress Inks for blending: Ranger Tim Holtz Mini Distress Ink Pads - Twisted Citron, Cracked Pistachio, Evergreen Bough and Mowed Lawn


Share
Tweet
Pin
Share
No comments


Hey guys, 

I know it has been a while since I have posted on my blog but I have definitely been cardmaking! Just stopping by to share a card that I made using Altenew's Paint-A-Flower Rose stamp. The sentiment is from Kraftgali's Peony Bliss Die.


Happy Crafting,
Kavya


Share
Tweet
Pin
Share
No comments
Newer Posts
Older Posts

About me


Hello! I am Kavya. Welcome to my blog where I share my love for all things papercrafting and cardmaking. I am excited that you decided to stop by and look around.

Social Media

  • Instagram

Followers

Follow by Email

Labels

alcohol ink markers altenew critters dry embossing embossing powder floral ink blending MFT newton's nook pencil coloring quilling Reverse Confetti Spellbinders Taylored Expressions Watercolors

recent posts

Blog Archive

  • ▼  2021 (8)
    • ▼  January (8)
      • Snarky Sentiments from Taylored Expressions
      • Stock your Stash Challenge : Reverse Confetti!
      • Happy Hex : New Kit at Taylored Expressions!
      • January Blog Hop: Reverse Confetti
      • Day 3 of Reverse Confetti Sneak Peeks!
      • Day 2 of Reverse Confetti Sneak Peeks!
      • Love is in the Air! with Taylored Expressions...
      • Hugs and Kisses with Reverse Confetti January Rele...
  • ►  2020 (39)
    • ►  December (7)
    • ►  November (7)
    • ►  October (2)
    • ►  September (12)
    • ►  August (1)
    • ►  July (5)
    • ►  March (1)
    • ►  February (4)
Cardmaking Instagram Handlettering Instagram

Created with by BeautyTemplates | Distributed By Gooyaabi Templates