
New Stencil Storage from TE + some fun stencils for your stash :)
Hi folks,
I am back on the blog with something exciting! I have waaay too many stencils and there isn't an easy way to store them. It's all a mess as I store them the same way I store my stamps and dies.... Well, until now! Taylor came to rescue and designed new Simple Storage Stencil Sleeves for 6×6 and Mini Slim stencil sizes along with the new Simple Storage Binders. They also come with Stencil Storage Stickers that you can order to label the stencils that was released in 2019, 2020, and now 2021! I am also using the slimline storage binder to store half finished projects and the 6x6 one for leftover foils!
Right now through 11:59PM CT Sunday, February 6th, when you buy more, you save more on stencils! Buy any 4 stencils to save 10%, buy 5-8 stencils to save 15%, and buy 9+ stencils to save 20%! This promotion is limited to in stock items and excludes the Create-in-Quads collection. It's a great time to pick up those stencil designs that have been on your wish list and stencils make great gifts for your crafty friends!

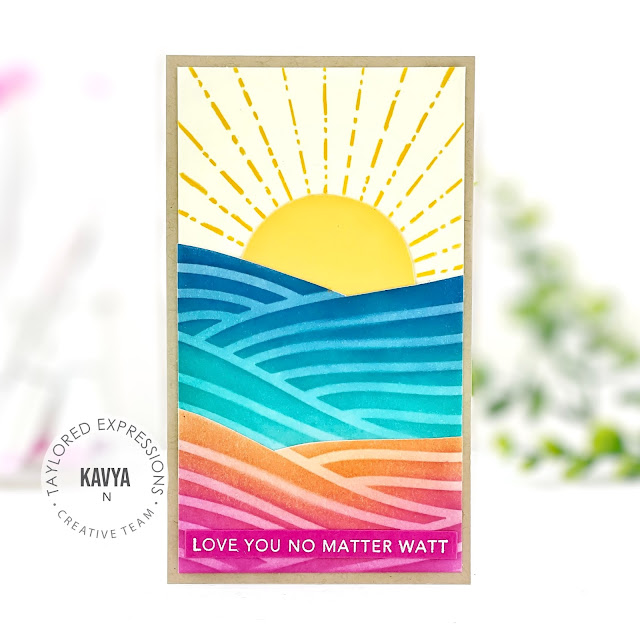
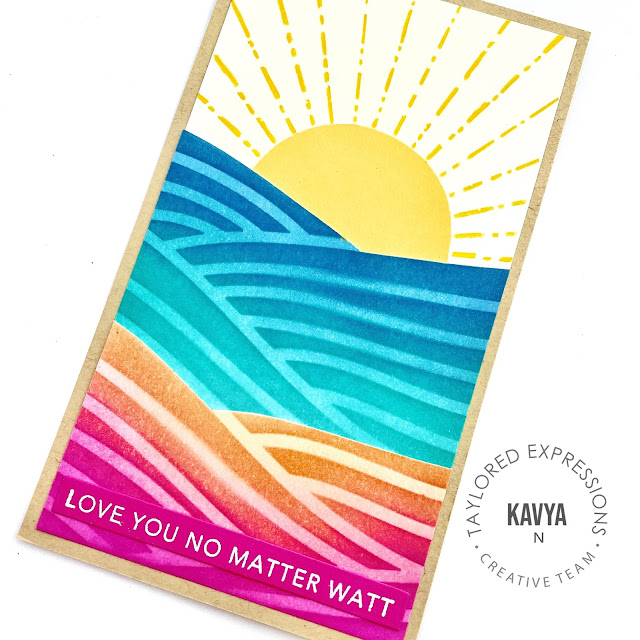
For my first card, I used the new mini slimline Tidal stencil to create a fun sea background inspired by the name of the stencil. For the 'land', I ink blended using Candy Corn and Lollipop. For the 'sea', I used Cookie Monster, Blue Raspberry and Blueberry. I cut each of these portions separately and placed them on top of Buttercream cardstock + Toffee cardstock mat. For the sun, I cut a circle using pineapple cardstock and added rays using a yellow color pencil! Finished it off with a sentiment from 'Watt's Up' as it was fitting!
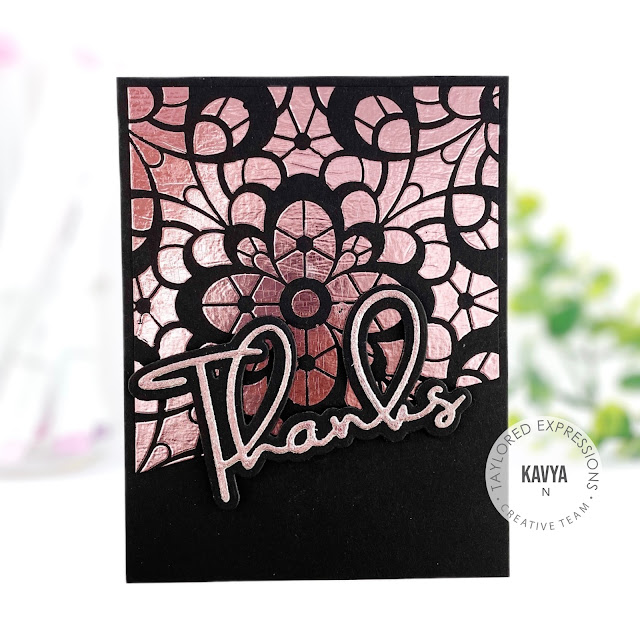
I finally got a chance to play with my minc laminator with this card! I first applied a layer of glitter grab using the new Chantilly stencil and waited for it to dry completely clear. This is a crucial step! Then, I ran it through my minc using Deco Foil Enchanted Rose foil and trimmed off the bottom at an angle and placed it on another piece of oreo cardstock. For my sentiment, I used the Signature Thanks die and die cut the top of the sentiment using TE's Sticky sheet placed on oreo cardstock. For the backer, I used Oreo cardstock. I then removed the top part of the Sticky sheet and rubbed my left over foil over it so that my 'Thanks' also looks foiled. I then placed the foiled Thanks and backer on top of my foiled base! That's it :) I absolutely love how the foil turned out!

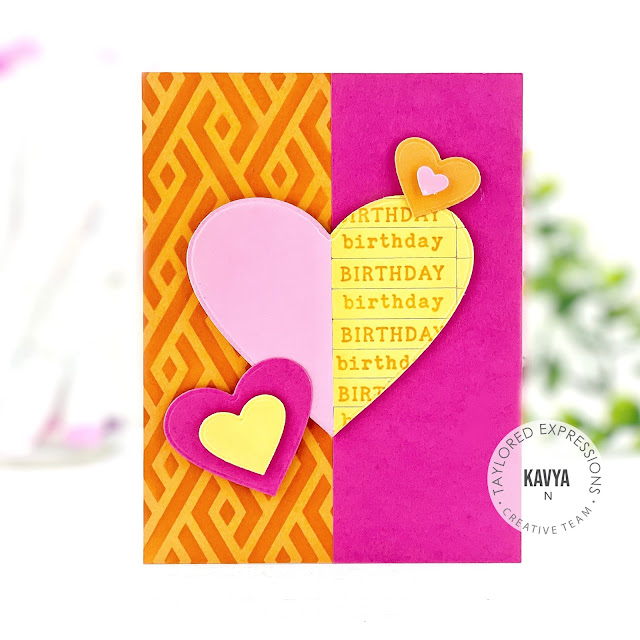
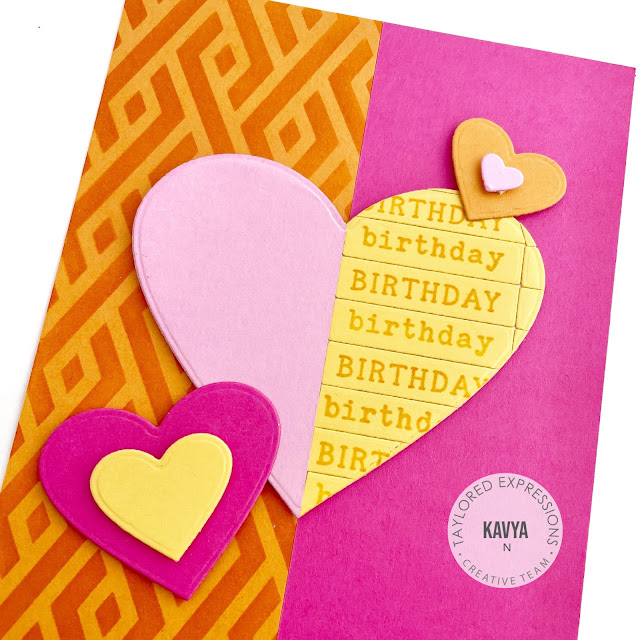
My next card uses a technique that I have been wanting to try out for a while - Colorblocking! This isn't exactly my style, but I love how This turned out! I first started off by cutting two strips of Candy Corn and Lollipop cardstock. I then ink blended the candy corn cardstock using Sweet Potato ink and Braided Diamond stencil. Then, I cut another strip of Cupcake and Pineapple cardstock and die cut a heart such that the center of the heart die is aligned with the 'meeting point' of the two cardstocks. I also cut a couple of smaller hearts to surround the larger heart :) Then, I die cut a bunch of On Repeat - Birthday and pasted them on the Pineapple side of the heart and cut around the edge of the heart :)
Supply List:
Happy Crafting,
Kavya


0 comments