Instagram YouTube

Handmade by Kavya
  • Home
  • Creative Resume
  • Contact Me

Hi folks, 


Today is Day 2 of the release and we are showcasing the new Farmhouse Wreath stamp and die set along with Big Love and Outlined Frame Cover Panel Confetti Cuts. I used the stamp and die set to make a cute card that is perfect for Valentine’s Day!


I first started off by ink blending a white card stock panel using shades of mint and blue dye inks. I then die cut the panel using the Outlined Frame Cover Panel. The panel is perfect for adding a gorgeous detailed border to your cards and can be used when you don’t have much going on in the center of the card. I then die cut the Big Love Confetti cuts using rose gold card stock and white glitter card stock. Then, I stamped various images from Farmhouse Wreath and colored them using colored pencils and alcohol markers. I replaced the heart in ‘Love’ with a circular floral wreath from the stamp set and I love how gorgeous it looks! I finished it off by adding some clear sequins and Nuvo crystal drops! 


For more inspiration, please check out the following terrific designers (there will be a $15 gift certificate to Reverse Confetti for one blog commenter and one for a Facebook commenter.  Comments eligible for a prize will close at noon CST on January 7th. Winner will be announced at 5pm CST on the Reverse Confetti blog and on the FB page on January 7th):

  • Reverse Confetti
  • Amy Kolling 
  • Tricia Barber  
  • Lisa Henke 
  • Jenny Colacicco  
  • Kathy Schweinfurth 
  • Jane Trivedi  
  • Jeanne Jachna  
  • Rebecca Keppel  
  • Audrey Tokach  
  • Kavya
  • Candice Fisher  
  • Amy Tsuruta  
  • Deanne Kuntz  
Happy Crafting, 

Kavya
Share
Tweet
Pin
Share
11 comments


Hi folks, 

First of all, Happy New Year to you and your family! I hope 2021 is off to a great start for everyone of you :) My first post for the new year is for TE's latest release for Valentine's day. As always, there are so many creative and adorable products to make cards for your loved ones! 

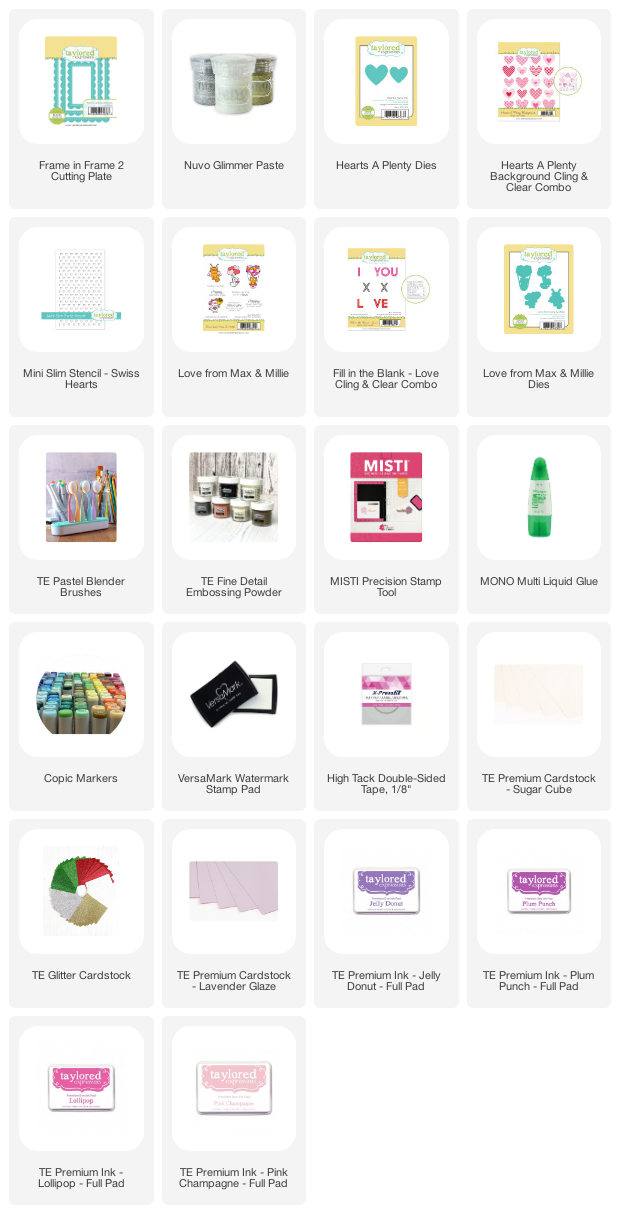
My first card uses the new Fill in the Blank - Love stamp set. I first ink blended the top half of Lavender Glaze cardstock using Plum Punch and Jelly Donut. I then used the Mini Slim Stencil - Swiss Hearts to stencil with Nuvo Moonstone Glimmer paste. The center portion of the card was made by die cutting the Frame in Frame 2 die using some white glitter cardstock and dry embossing a white cardstock using the Mini Slim Stencil - Swiss Hearts. Then, I stamped the letters using Jelly Donut and and the hearts from Hearts a Plenty background stamp using Pink Champagne and Lollipop inks. Finally, I used an image from the Love from Max and Millie stamp set in place of the 'O' in 'Love'!

 
Supply List:

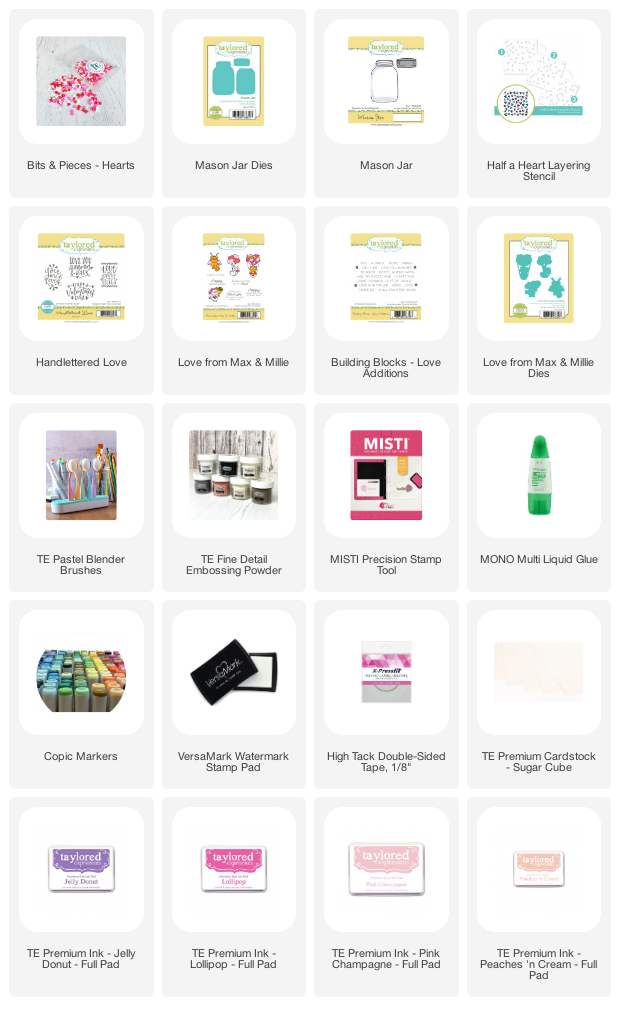
My next card uses the new Half a Heart Layering stencil that can be used to create a gorgeous background for any card! I started off by ink blending my panel using Peaches and Cream and Pink Champagne dye ink. I then stenciled the hearts using Jelly Donut, Lollipop and Pink Champagne. Then, I die cut the mason jar multiple times and stamped the jar using Oreo ink. I used one inside portion of the jar to ink blend using Peaches and Cream and Pink Champagne ink so that it matches the panel. Later, I stamped a sentiment from the Handlettered Love set using Lollipop ink and used the new Bits & Pieces: Hearts to create a shaker card :) I finished off by adding a stamped images from the Love from Max and Millie stamp set and a sentiment from Building Blocks - Love Addition. 


Supply List:


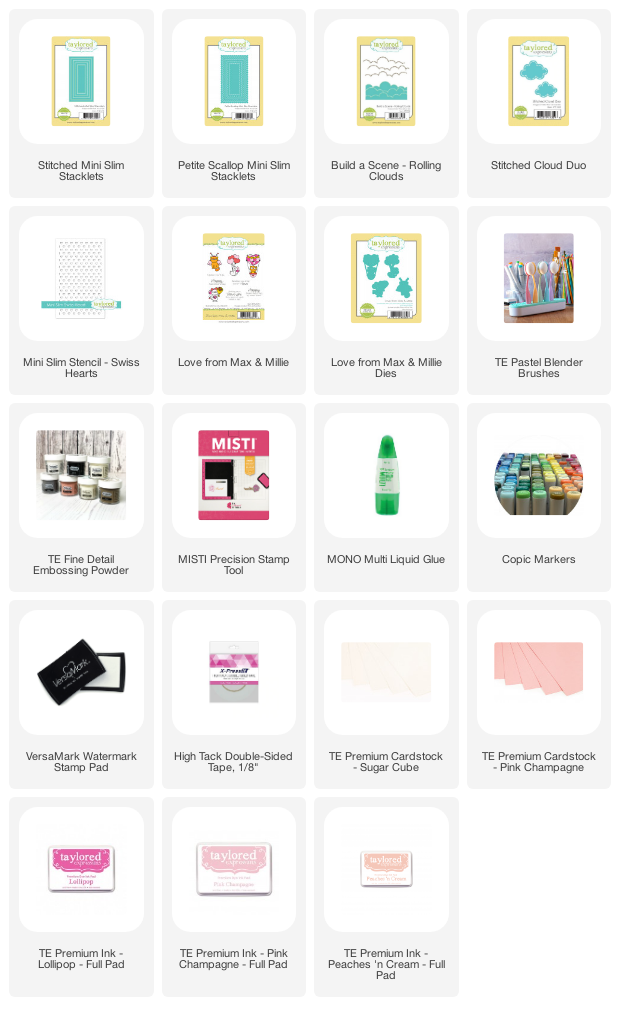
My final card for the release is a cute sky themed mini slimline card perfect for your bestie! I first started off by using Petite Scallop Mini Slimline Stacklets in Pink Champagne and Stitched Mini Slim Stacklets in Sugar Cube for my base. I ink blended the Sugar Cube cardstock using Lollipop, Pink Chmapagne and Peaches and Cream. Later, I stencilled using Mini Slim Stencil - Swiss Hearts using the same colors as the background. I stamped and colored some images from Love from Max and Millie stamp set and finished it off by adding some clouds from Stitched Cloud Duo and Build a Scene: Rolling Clouds. 


Supply List: 

That's all folks! Be sure to check out the projects by rest of the DT to see all the different ways you can use the new release!

Happy Crafting,
Kavya 
Share
Tweet
Pin
Share
No comments


Hi folks, 

I am super excited to be a 'Fetti Friend at Reverse Confetti for January and February. Their new Valentines Day release is just adorable and I can't wait to share all my projects with you!


Today is Day 1 of the release and we are showcasing the new Words of Love stamp set and Big Love Confetti Cuts. I used the stamp and die set to make an adorable treat box and coordinating wrapping paper for a gift! This is super easy to put together and is perfect for that special someone in your life! 


For the treat box, I used a template that I found online to assemble my box out of baby pink cardstock. I ink blended the bottom half the box using shades of purple and pink dye inks. I then splattered some white paint as always! I heat embossed the sentiments from the Words of Love stamp set and die cut the Big Love using Rose gold and light pink cardstock. I also used the heart that comes with the Big Love die to die cut the window that allows you get a quick sneak peak at the treats! I also adhered the 'heart border' from the die cut to create intertwined hearts! 


For more inspiration, please check out the following terrific designers (there will be a $15 gift certificate to Reverse Confetti for one blog commenter and one for a Facebook commenter.  Comments eligible for a prize will close at noon CST on January 7th. Winner will be announced at 5pm CST on the Reverse Confetti blog and on the FB page on January 7th):

  • Reverse Confetti
  • Amy Kolling 
  • Tricia Barber  
  • Lisa Henke 
  • Jenny Colacicco  
  • Kathy Schweinfurth 
  • Jane Trivedi  
  • Jeanne Jachna  
  • Rebecca Keppel  
  • Audrey Tokach  
  • Kavya
  • Candice Fisher  
  • Amy Tsuruta  
  • Deanne Kuntz  
Happy Crafting, 

Kavya
Share
Tweet
Pin
Share
9 comments


Hi folks! 

I am back at Crafty Meraki with yet another card using the new MFT Frost Loving Friends stamp set! I have already showed you two other cards made using this set... this week's card uses the single bunny image from the stamp set who looks like he is ready to give a hug. Just pick non-winter colors and this card can be used all year long and not just for winter! Here is how I put this together:

  • First, I stamped the image from MFT’s Frost Loving Friends and colored it using alcohol markers and colored pencils
  • Then, I used the MFT Sending You Hugs die to partially die cut the 'Sending You'
  • Using the same die, I die cut the 'Hugs' using pink and silver glitter cardstock
  • I ink blended the heart using shades of blue and added ink splatters using white ink. I also added some stars using a white gel pen. 
  • I also stamped a sentiment from the same set using a black ink pad.
  • Finally, arrange the elements as shown below and add some sequins for extra bling!


Isn't that simple? This stamp set is truly versatile and there are so many ways to use it if you stretch your imagination! Get yours at Crafty Meraki before they are out of stock!

Thanks,
Kavya  
Share
Tweet
Pin
Share
No comments


Hi folks, 

I am back at Crafty Meraki with yet another card  using the new MFT Frost Loving Friends stamp set! Can you just tell how much I love this set? This time, I made a cool ski themed card using one of the bunnies from the set. Here is how I put this card together:

  • First, I stamped images from MFT’s Frost Loving Friends and Happy Campers and colored them using alcohol markers and colored pencils. 
  • I then ink blended the top half of the panel using shades of blue and pink dye inks. Add paint splatters to make it look like snow!
  • After adhering the images on to the inked panel, I added ‘snow’ to the stamped images using a white gel pen.
  • Finally, I stamped a sentiment from MFT’s Snow Buddies stamp set!


Wasn’t that simple? Be sure to check back next week to see yet another way to use this stamp set!

Thanks,
Kavya 


Share
Tweet
Pin
Share
No comments


Hey folks, 

Taylored Expressions is releasing products from the Farm Fresh, Field Notes and Hey There kits for individual purchase and I am excited to show some cards where I combined them with some other old TE products! Let’s get started... 

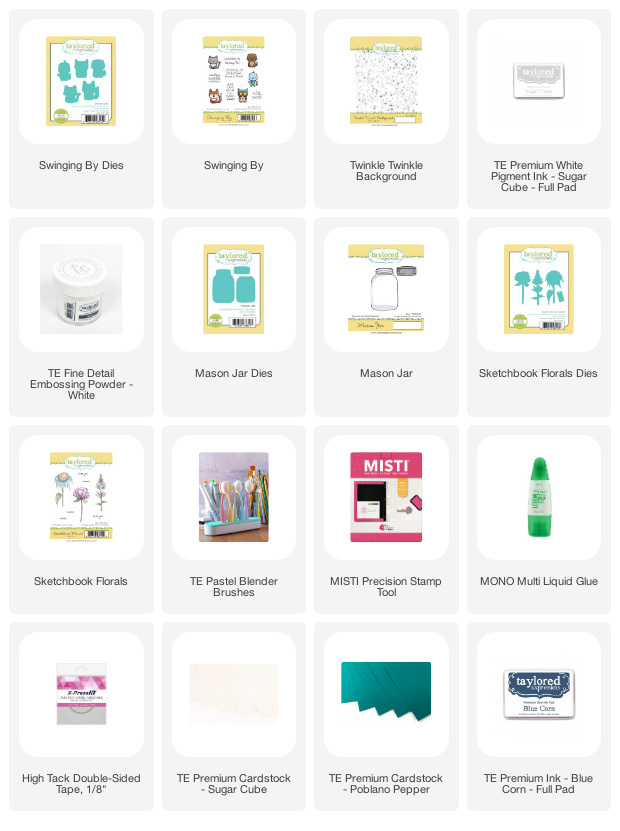
My first card uses the Sketchbook florals stamp set with the Twinkle Twinkle background stamp, Mason jar stamp set and a sentiment from Swinging By stamp set. I first distressed the edges of Poblano Pepper card stock with Bluecorn ink and stamped the Twinkle background using Sugar Cube Ink. I then heat embossed the mason jar and sentiment using white embossing powder. The florals were colored using Copic Markers and colored pencils. I also added some shadows to the mason jar using colored pencils and completed some of the missing lines of the jar’s rim using a white gel pen.


Supplies Used:


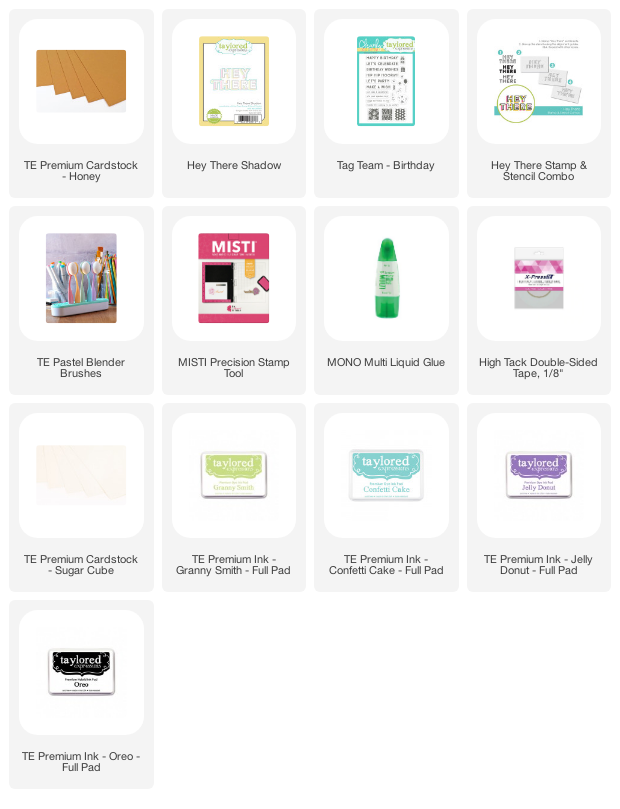
My second card is a CAS card that can be used for any special occasion! I used Honey colored card stock for my base and stenciled the Hey using Confetti Cake, Jelly Donut and Granny Smith Inks. I then die cut just the ‘Hey’. Finally, I stamped some sentiments from Tag Team: Birthday to finish it off!


 Supplies Used:


Thanks, 
Kavya
Share
Tweet
Pin
Share
No comments


Hi folks, 

I am back at Crafty Meraki with a warm winter themed card using the new MFT Frost Loving friends! I love Stacey Yacula's illustrations and this one is just adorable... This quick card uses one of the stamped images with some alpha dies to create a card perfect for a special friend. Here is how I put this card together:

  • I first distressed an A2 panel using a peach and pale pink dye ink. Any warm color works! I then splattered some white paint and ink blended using a snowflake stencil 
  • I then die cut an evergreen forest border and distressed the die cut using the same colors as the panel in order to achieve a monochromatic look!
  • I then colored the stamped image using copic markers and colored pencils
  • For the large sentiment, I die cut the letters using a rose gold glitter cardstock and then placed it on a white cardstock with a little offset so that it looks like a shadow
  • Finally, using some masking, I stamped one of the sentiments from the same set using a brown ink pad


Isn't this card just adorable? Be sure to check back for more inspiration!

Thanks,
Kavya 
Share
Tweet
Pin
Share
No comments


Hi folks!

I am super excited to be a part of MFT's December release! This new release has so many adorable and versatile products just like every single release of theirs! For my card, I was inspired by the movie 'Alice in Wonderland' and decided to create a Tea Party scene complete with Mad Hatter, Alice and a few friends using the newly released Tea Party stamp set! 


For Alice, I used the one of the girls from BB Unicorns and Glitter and masked off the unicorn horn while stamping. The attire of the girl was perfect for creating this card! I just had to add the white apron to her dress and its was complete! 


For the Mad Hatter, I ended up drawing the coat and added a tiny white card that said 10/6 to the hat! 


And that's about it! Wasn't it easy to create this card? As always, I love stretching my stamps and thoroughly enjoyed putting this card together! Be sure to check out other inspiration from MFT Friends here .

Thanks for stopping by! If you like to see more of my work, be sure to follow me on Instagram at @handmadebykavya

Best,
Kavya

Share
Tweet
Pin
Share
28 comments

Hi folks! 

There is a new kit release today at Taylored Expressions and super stoked! This is definitely one versatile kit that can be combined with many existing products and can be used to create cards for different occasions! How cool is that? 

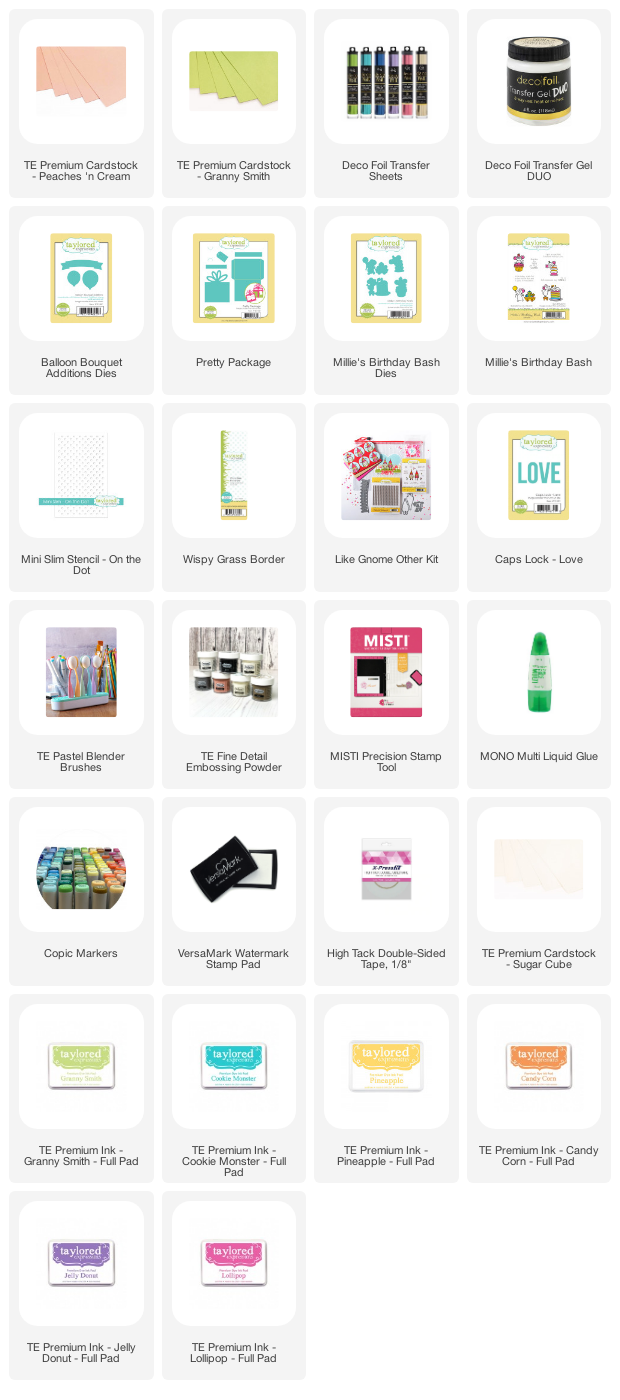
My first card is perfect for Valentine's day or for that special someone! I first started off by ink blending the panel using Cookie Monster and Granny Smith Ink. I then used the On the Dot slimline stencil to stencil the background using Cookie Monster. For the grass and land, I used the Wispy Grass Border die with Granny Smith cardstock and the fence die included in the kit with Peaches and Cream cardstock. I ink blended the edges using the same ink colors and splattered some white, green and brown paint to make it more realistic. The large 'Love' was cut using the Caps Lock - Love die and ink blended using Lollipop and Jelly Donut Inks. I then colored the gnomes and mushrooms using Copic markers and Prismacolor colored pencils. I finally stamped some hearts and a sentiment that is included in the kit! I just love how this card turned out!

My second card is a birthday themed card that I made using the kit contents and some birthday themed products released in September. I first stamped the knit background using Cookie Monster, Granny Smith, Pineapple and Candy Corn inks. I used the same inks to ink blend a smaller panel that I used for the bottom half of the panel. For the balloon, I first applied some Deco Transfer Gel Duo on cardstock and then applied some silver foil after it dried and ran it through my die cutting machine. I then die cut a balloon using the Balloon Bouquet Addition Dies. The sentiment was stamped using the tag die that is a part of the Pretty Package die set. I then colored the gnome and some stamped images from Millie's Birthday Bash using Copic markers and Prismacolor colored pencils. 


Supply List: 

Be sure to check out what the rest of the team has created using the kit! You won't regret it!

Thanks,
Kavya 

Share
Tweet
Pin
Share
No comments


Hi folks, 

I am back at Crafty Meraki with another card! This one shows you yet another way to use CM's very own slimline die - Bubble Mania. There are so many ways in which you can use this die especially with critters. Here is how I put this space themed card together:

  • I first ink blended a small square panel using black, purple, royal blue and sky blue dye inks. I then splattered some white paint and Inkon3's Liquid Pixie Dust for the stars 
  • I then die cut the slimline die using some black and white cardstock and trimmed off the excess 'bubbles'. I then used some of the bubbles from the white cardstock to color planets using colored pencils and alcohol ink markers. 
  • I then finished off the card by adding an adorable space explorer from MFT's Space Explorer and added a sentiment from CM + Heffy Doodle collab Superstar stamp set 
I hope you liked this quick and unique way to use CM's Bubble Mania Slimline die!

Thanks,
Kavya 


Share
Tweet
Pin
Share
No comments


Hi folks, 

I am back at Crafty Meraki with another card using CM's very own Stitch A Cross slimline die. If you aren't into cross stitching, there are still other ways in which you can use the die! As the die doesn't cut the outer edge, you can tile the die and use it to cut any size. I decided to create a card inspired by the movie Jurassic Park! I used various MFT stamps to put together this scene of some rather friendly dinosaurs, John Hammond and his two grandkids - Lex and Tim. I even tried to get their clothes right! For this 4.25'x7' card, I used the die to create a simple yet dramatic background! Here is how I put this together:
  1. For my base, I used a lighter shade of brown to die cut using the Stitch A Cross slimline die. I then places this on a cardstock of a darker shade of brown.
  2. The central semi-circle was die cut using Sunny Studio Stamps' Stitched Semicircle Die. I ink blended die cut panel using dye ink shades of red, orange and yellow.
  3. For the grass and land, I used Sunny Studio Stamps' Slimline Nature Border dies and slightly ink blended the edges using green and brown ink. I also splattered white and green/brown paint!
  4. The critters were colored using alcohol ink markers and Prismacolor colored pencils. I used MFT's A-Roar-able Friends, Old Friends and Adorable Adventures stamp sets for the critters. 
  5. For the 'RAWR', I die cut the alphas and added the inner details using colored pencils so that the font looks like the one on Jurassic Park's title card! 


That's about it! I hope you liked this movie inspired card :) 

Thanks,
Kavya 
Share
Tweet
Pin
Share
No comments
Newer Posts
Older Posts

About me


Hello! I am Kavya. Welcome to my blog where I share my love for all things papercrafting and cardmaking. I am excited that you decided to stop by and look around.

Follow me on Social Media

  • Instagram
  • YouTube

Cards by Brand

Alex Syberia altenew Heffy Doodle Mama Elephant MFT newton's nook Pear Blossom Press Reverse Confetti SugarPea Designs Sunny Studio Stamps Taylored Expressions Wow Embossing

Blog Archive

  • ▼  2024 (11)
    • ▼  October (1)
      • Bear Hugs ft Taylored Expressions
    • ►  September (1)
    • ►  August (1)
    • ►  July (1)
    • ►  June (1)
    • ►  May (2)
    • ►  April (1)
    • ►  March (1)
    • ►  February (1)
    • ►  January (1)
  • ►  2023 (15)
    • ►  December (1)
    • ►  November (2)
    • ►  September (3)
    • ►  August (1)
    • ►  July (1)
    • ►  June (1)
    • ►  May (1)
    • ►  April (2)
    • ►  March (1)
    • ►  February (1)
    • ►  January (1)
  • ►  2022 (34)
    • ►  November (4)
    • ►  October (1)
    • ►  September (3)
    • ►  August (1)
    • ►  July (1)
    • ►  June (5)
    • ►  May (5)
    • ►  April (2)
    • ►  March (5)
    • ►  February (3)
    • ►  January (4)
  • ►  2021 (47)
    • ►  December (1)
    • ►  October (3)
    • ►  September (6)
    • ►  August (5)
    • ►  July (2)
    • ►  June (4)
    • ►  May (3)
    • ►  April (4)
    • ►  March (4)
    • ►  February (6)
    • ►  January (9)
  • ►  2020 (28)
    • ►  December (7)
    • ►  November (7)
    • ►  October (2)
    • ►  September (11)
    • ►  August (1)

Popular Posts

  • Sunny Studio Stamps 6th Birthday Blog Hop!
      Hi folks,  Welcome to the Sunny Studio Stamps 6th Birthday Blog Hop! This new release is just so much fun! If you love Christmas.. this on...
  • Sunny Studio Stamps 7th Birthday Blog Hop
      Hi folks,  I am back on the blog with another fun card! I know it's been weeks since I have posted but life's been crazy :) But, I...
  • Heffy Doodle + Sunny Studio Stamps blog hop!
    Hi folks,  Welcome to the Heffy Doodle and Sunny Studio Stamps Collaboration Blog Hop! Design Team members from both companies are sharing i...
  • New Gel Printing Kit from TE
      Hi folks,  TE has a new kit and it's all about gel printing! I have never tried it before so I was excited to get my hands on it and t...
  • Go Cray-zy! It’s the Pear Blossom + Heffy Doodle blog hop!!
      Hi folks,  Today, we’re kicking off a CRAFTY Collaboration Blog Hop with Pear Blossom Press and Heffy Doodle !  Come hop along with us and...
  • You are my Best-Tea! : MFT Dec Release!
    Hi folks! I am super excited to be a part of MFT's December release! This new release has so many adorable and versatile products just l...
  • Toy Story ft. MFT Stamps!
    Hi folks,  I am back on the blog with another fun project for MFT’s Cardmaking Superstar competition. I always love taking part in every yea...
  • Christmas Gifting Kit from TE!
      Hi folks,  TE has a new Christmas Gifting Kit that has many unique products that make packaging and decoration super adorable! As always, ...
  • TE - Happy Father's Day!
      Hi folks,  I am back on the blog with another fun release from Taylored Expressions - Father's Day! I love this release... it's so...
  • Mass produce Christmas cards easily with TE!
      Hi folks,  I am back on the blog with another fun release from TE! I love how the new Create in Quad stencils make it super easy to mass p...

Followers

Check out more cards on my Instagram here Watch Cardmaking videos on my YouTube channel here

Created with by BeautyTemplates | Distributed By Gooyaabi Templates