Instagram YouTube

Handmade by Kavya

  • Home
  • Creative Resume
  • Contact Me


Hi folks, 

I am back at Crafty Meraki with another card using CM's very own Stitch A Cross slimline die. If you aren't into cross stitching, there are still other ways in which you can use the die! As the die doesn't cut the outer edge, you can tile the die and use it to cut any size. I decided to create a card inspired by the movie Jurassic Park! I used various MFT stamps to put together this scene of some rather friendly dinosaurs, John Hammond and his two grandkids - Lex and Tim. I even tried to get their clothes right! For this 4.25'x7' card, I used the die to create a simple yet dramatic background! Here is how I put this together:
  1. For my base, I used a lighter shade of brown to die cut using the Stitch A Cross slimline die. I then places this on a cardstock of a darker shade of brown.
  2. The central semi-circle was die cut using Sunny Studio Stamps' Stitched Semicircle Die. I ink blended die cut panel using dye ink shades of red, orange and yellow.
  3. For the grass and land, I used Sunny Studio Stamps' Slimline Nature Border dies and slightly ink blended the edges using green and brown ink. I also splattered white and green/brown paint!
  4. The critters were colored using alcohol ink markers and Prismacolor colored pencils. I used MFT's A-Roar-able Friends, Old Friends and Adorable Adventures stamp sets for the critters. 
  5. For the 'RAWR', I die cut the alphas and added the inner details using colored pencils so that the font looks like the one on Jurassic Park's title card! 


That's about it! I hope you liked this movie inspired card :) 

Thanks,
Kavya 
Share
Tweet
Pin
Share
No comments


Hi folks, 

I am back at Crafty Meraki with another card using one of my fav CM dies from the Meraki Craftober release - Whole Heartedly Slimline Die. The best thing about this dies is that it doesn’t die cut the outset edge so you can use this die for your A2 cards as well to create gorgeous backgrounds! Here is how I put this card together: 

  • Ink blend an A2 panel using shades of salmon pink, pale orange and yellow. I used premium dye inks as I find them easier to blend. 
  • Stamp and color images from MFT Woof Pack I used Prismacolor colored pencils and Copic markers to color my images and added highlights using a white gel pen. 
  • For the sentiment, I used masking to stamp one of the sentiments from the MFT Woof Pack set inside a speech bubble from MFT All the Encouragement stamp set. Definitely an easy way to stretch the stamp set!
  • Die cut the panel using the CM Whole Heartedly die at an angle. I then placed this on a card base and ink blended the die cut side lightly with the same colors used initially. I also placed some left over die cut hearts on the opposite side. 
  • Finally, adhere the stamped images and panel on to a card base and you are done! Isn’t that simple and cute? 

Hope you like this quick tutorial to stretch your supplies! See you guys next week :) 

Thanks, 
Kavya 

Share
Tweet
Pin
Share
No comments


Hi folks, 

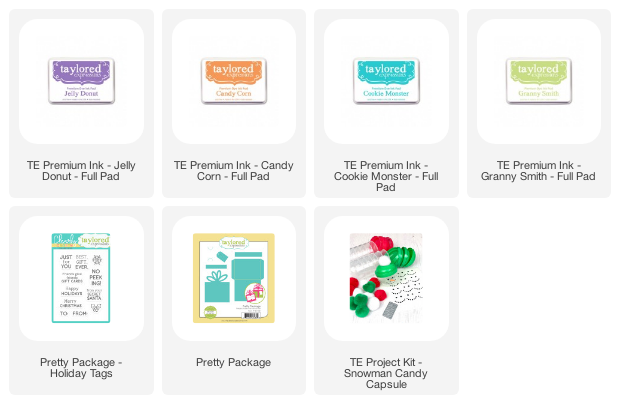
Taylored Expressions has a new Snowman Candy Capsule kit that is perfect for all your winter décor and gift ideas! The minute I saw this I knew I could use it to make some secret Santa gifts for friends. I made a hot cocoa gift set by hot gluing two capsules together.


 The bottom capsule is the perfect size for one serving of hot cocoa powder. The top capsule has some mini marshmallows and some white chocolate! The snowman’s scarf was made by scrunching some paper and adding stripes using markers. I used the tag from Pretty Package die and the Christmas add on for the same set to make some gift tags :) I hope you liked seeing another way to use the capsule kit!


Happy Crafting, 
Kavya 

Share
Tweet
Pin
Share
No comments


Hi folks, 

I am back at Crafty Meraki with some more inspiration using products released by CM during Meraki Craftober. For this card, I used the Crafty Plaid slimline die and Heffy doodle Collab Superstar stamp set. 

The crafty plaid slimline is so versatile and can be used for creating non-winter cards to create a subtle background. Here is how I made this card:
  • First, ink blend your panel (mini slimline) using orange, yellow and blue dye inks. 
  • Then die cut the Crafty Plaid die using white cardstock and trim about 1/4 inch on each side. 
  • I added think white strips to the edges of the die cut to add border
  • Stamp various images from MFT's Sending Warm Hugs stamp set and color them using alcohol makers and colored pencils
  • Heat emboss a sentiment of your choosing from the Heffy Doodle collab stamp set and you are done :) 

How simple is that?

Hope you liked this quick tutorial! Stop by for more inspiration from the design team throughout the month...

Thanks,
Kavya 


Share
Tweet
Pin
Share
No comments


Hey folks! 

I hope your week is off to a great start. Calendars are one of our favorite crafts to make, and one of our favorite gifts to give or receive. This year, TE offering this exclusive Handcrafted Calendar Kit to help you get ready for 2021! It includes everything you need to make a customized 5″ x 8″ calendar designed to hang from a magnetic walnut wood hanger. It comes packaged in a plastic clamshell box with an exclusive kit sticker (perfect for gift-giving!), and includes:
  • Walnut Wood Hanger Frame (includes 12″ length of leather cord)
  • 5×8 2021 Dated Grid Calendar (12 individual 5″ x 8″ sheets printed on 100 lb. Sugar Cube cardstock)
  • Stencil Strips – Calendar (set of 12, numbered to correspond with the months of the year)
  • Group Text – Months stamp
  • Group Text Die
  • Clearly Crafty It’s a Date stamp set

Most items not available to purchase separately. Limited quantity available.

The items that are available to purchase separately for this kit release are: 5×8 2021 Dated Grid Calendar, the Walnut Wood Hanger Frame, 5×8 Clear Calendar Boxes, and the Stamp & Style Pouch.


Here is what I made with the kit for the first 6 months! For the backgrounds, I stenciled the the top half and the bottom half of the blank calendar sheets using Pineapple, Candy Corn, Granny Smith, Cookie Monster, Jelly Donut and Pink Champagne inks and coordinating stencils. I left about 1/2 inch of the top empty as it would be covered by the magnetic woof hangar frame anyways. 


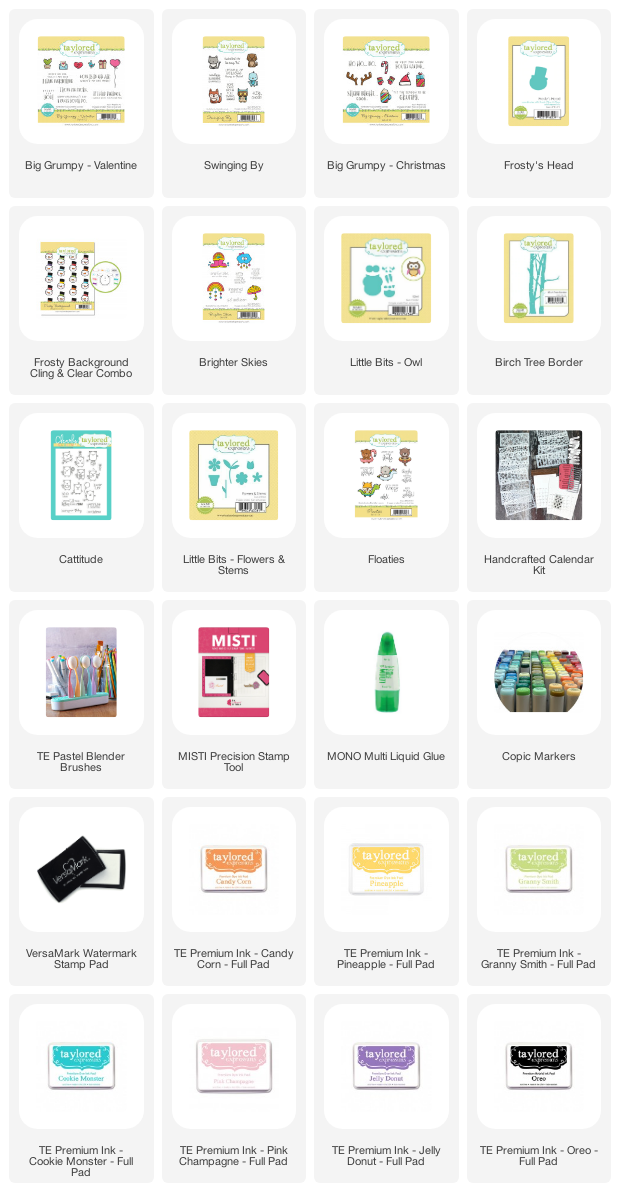
The calendar has enough space at the top that is perfect for creating mini scenes! I used a bunch of old TE stamps to create one for each month. You don't always have to use the stencils. Feel free to decorate them with background stamps and dies!  For a detailed list of all the stamps used, check the Linkdeli at the end of the post. All of the images were colored using Copics and colored pencils :) 


Supply List: 

Be sure to check out TE's blog for more inspiration :)

Thanks for stopping by,
Kavya 


Share
Tweet
Pin
Share
No comments


Hey! 

I am back at Crafty Meraki's blog with a card perfect for Diwali! Diwali is usually all about food and dressing up for me and I had to make a card that embodies just that! Soooo many of you DM'ed me on Instagram to know how I put this together! Hope these instructions help: 

  • First, ink blend a panel using Violet, Sapphire Blue and Sky Blue dye inks.
  • Mask an oval in the center and then use the 'mandala' stamps in the Crafty Meraki Diwali Greetings stamp set to create a background. I heat embossed mine using Gold Sparkle embossing powder for the extra shine!  Fell free to use a gold marker to add additional details.
  • Color various images from Crafty Meraki Diwali Greetings, Happy Diwali and CM + InkOn3 Shine Bright stamp set using Copics and colored pencils.
  • For the traditional Indian girl dressed in a pattu pavada, I modified a girl from MFT BB Unicorns and Glitter stamp set! I added some extra details using a gold marker! 
  • Finish off the card with a gold heat embossed sentiment and you are done! 


Supplies Used:

  • CM Diwali Greetings
  • CM Happy Diwali
  • CM + InkOn3 Shine Bright 
  • MFT BB Unicorns and Glitter 
  • Gold Embossing powder
  • Versamark Ink 
Thanks, 
Kavya 
Share
Tweet
Pin
Share
1 comments


Hi folks! 

I am back with another release from Taylored Expressions....it's for New Year! Not sure, if it's going to be a 'happy' one but I sure am looking forward to 2021... not that things are going to get back to normal once the clock strikes 12! Things were just emotionally exhausting this year! Luckily, I had the crafting community and this hobby to keep me going! I started sharing my cards on IG in late Jan this year so I am definitely looking forward to my one year craft-versary! 

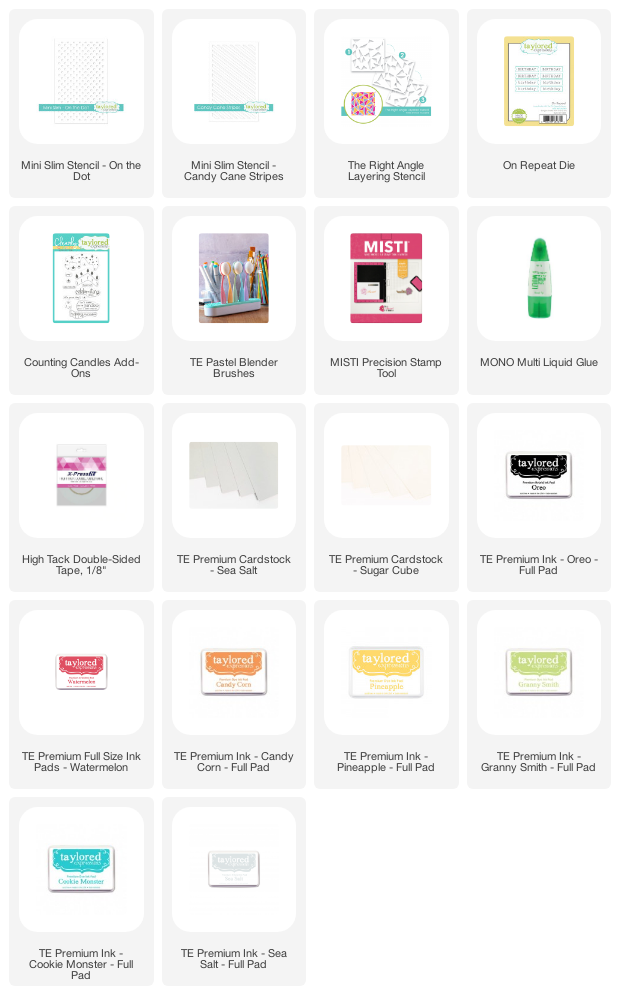
For my first card, I used Cookie Monster, Granny Smith, Pineapple, Candy Corn and Watermelon to ink blend the first 2 stencils using the Right Angle stencil set. I placed this at angle so that I have some space to stamp a sentiment later on. I then placed a Stripe stencil (I used the October freebie but the Mini Slimline Candy Cane stencil is a great alternative!) on top of the third stencil and gently stenciled using Sea Salt. I then went back to the first stencil and using the Mini Slim Stencil - on the Dot to stencil using complementary colors. I then stamped a sentiment from Counting Candles - add on and placed the entire panel on some Sea Salt cardstock :) 

Supply List:


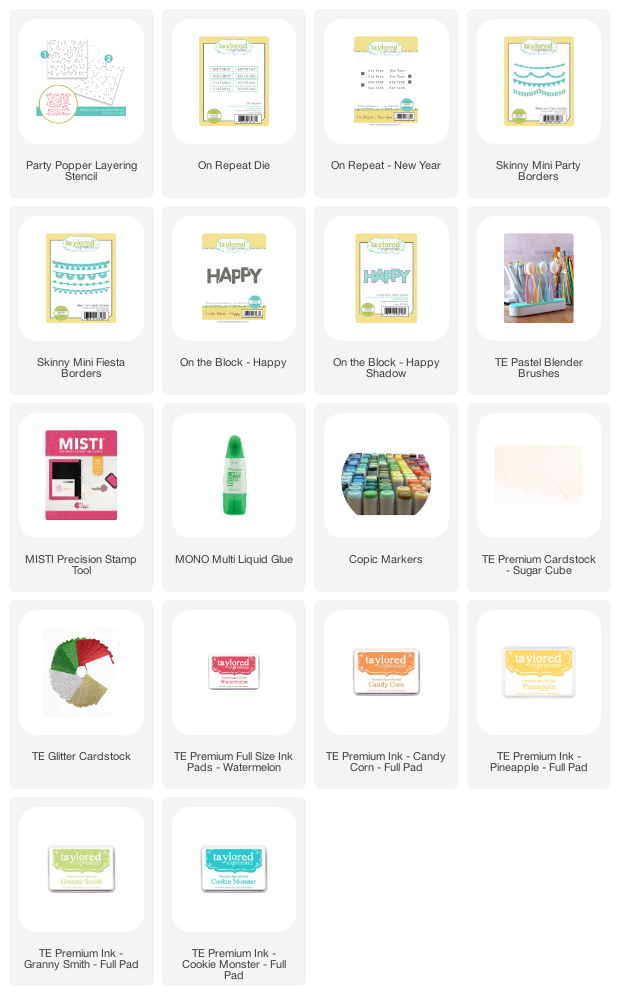
My next card screams PARTY! (a socially distanced one of course!) For this card, I lightly ink blended the top half of the card using the Party Popper stencil and Watermelon, Candy Corn, Pineapple, Granny Smith and Cookie Monster inks. I stamped the 'Happy' sentiment using Sea Salt and colored it in using Copic markers. I added a shadow using some gold cardstock! I then die cut various party streamers from Skinny Mini Party Borders and Skinny Mini Fiesta Borders using Sugar Cube cardstock and then colored them using Copic markers. I finished it off by adding a 'New Year' sentiment using the On-Repeat stamp and die set.

Supply List:
I hope you like these colorful card! Be sure to check out what the rest of the team has in store :)

Adios, 
Kavya  

Share
Tweet
Pin
Share
No comments


Hi folks, 

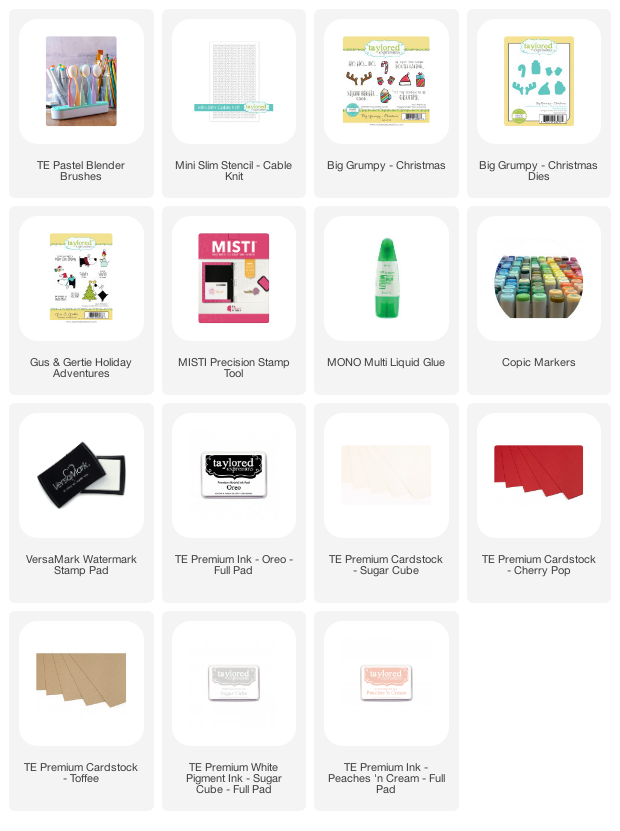
There is a new release that I am super excited about! Taylored Expressions has some new stencils and pastel blender brushes! First of all, how gorgeous are these brushes? I love mine and I can't wait to use them for my distress inks so that I don't contaminate them with my hybrid inks! I also switched over to the new Tool Tray as its much more convenient and saves space on my tiny craft desk. If you are looking for a compact holder for your brushes and other tools, this one is for you!


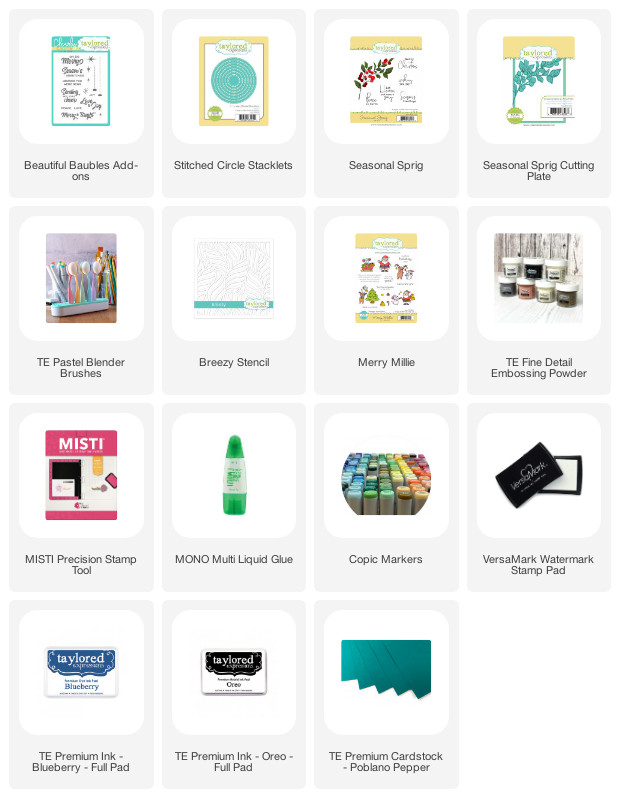
I am super excited about the new stencil release as well and I have a bunch of cards to share with you all. My first card uses the Breezy stencil. I first stenciled using blueberry ink on poblano pepper cardstock and then dry embossed it to give a subtle dimension. I then assembled the seasonal sprigs and then die cut them using the circle stacklet die to create an ornament. I finally used white embossing powder to heat emboss the sentiment from Merry Millie and Beautiful Baubles Add on and added some 'sparkles' by splatting some paint using TE Shimmer liquid watercolor! 


Supply list: 


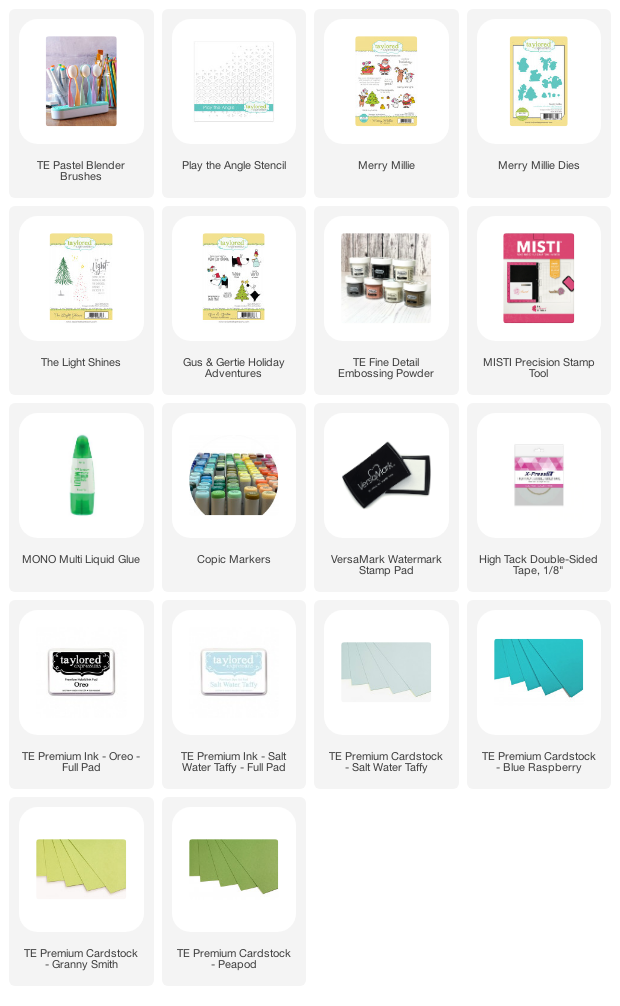
For my next card, I used the Play the Angle stencil to create a fun geometric themed Christmas card. I first stenciled on salt water taffy cardstock using salt water taffy ink. I then cut some triangles out of granny smith, peapod and blue raspberry cardstock in various sizes and heat embossed the white dots using the 'light' stamp from the light shines on stamp set. I finished it off by adding the Santa and some presents from Merry Millie and a sentiment from Gus & Gertie Holiday Adventures.

Supply List:


My next card is super simple to recreate and is just adorable! I first stenciled on Cherry Pop cardstock using the new Cable Knit stencil and Sugar Cube Ink. I then stenciled on a smaller Sugar cube cardstock using Peaches and Cream. I used Toffee cardstock to mat the Sugar Cube panel on the Cherry Pop Cardstock. I finished it off by adding reindeer antlers from Big Grumpy Christmas and a sentiment from Gus & Gertie Holiday Adventures. I added the red nose using a marker! 


Supply List: 


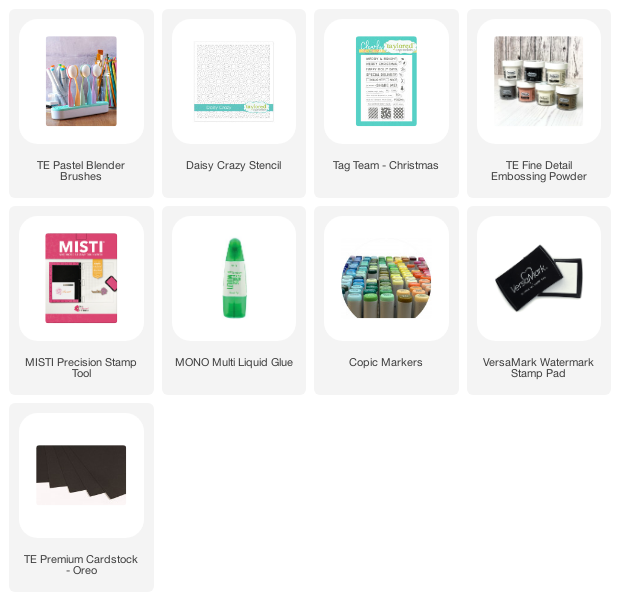
My final card is a super quick and elegant Christmas card! I first masked off a large tringle aka minimalist Christmas tree on Oreo cardstock. I then stenciled using the Daisy Crazy stencil by directly dabbing Versamark embossing ink. I then heat embossed this and some sentiments from Tag Team - Christmas in gold! How simple is that? Love the minimalist look of this card! 


Supply List:


Thanks for stopping by! Be sure to check out some more inspiring cards from the rest of the design team!
 

Share
Tweet
Pin
Share
No comments

Hi folks!

It's release day at Taylored Expressions and I have so many awesome cards to share with some of the latest products. This is their biggest release yet with more than 40 products and I can truly say that I LOVE critters now! Without further ado.. let's get started!

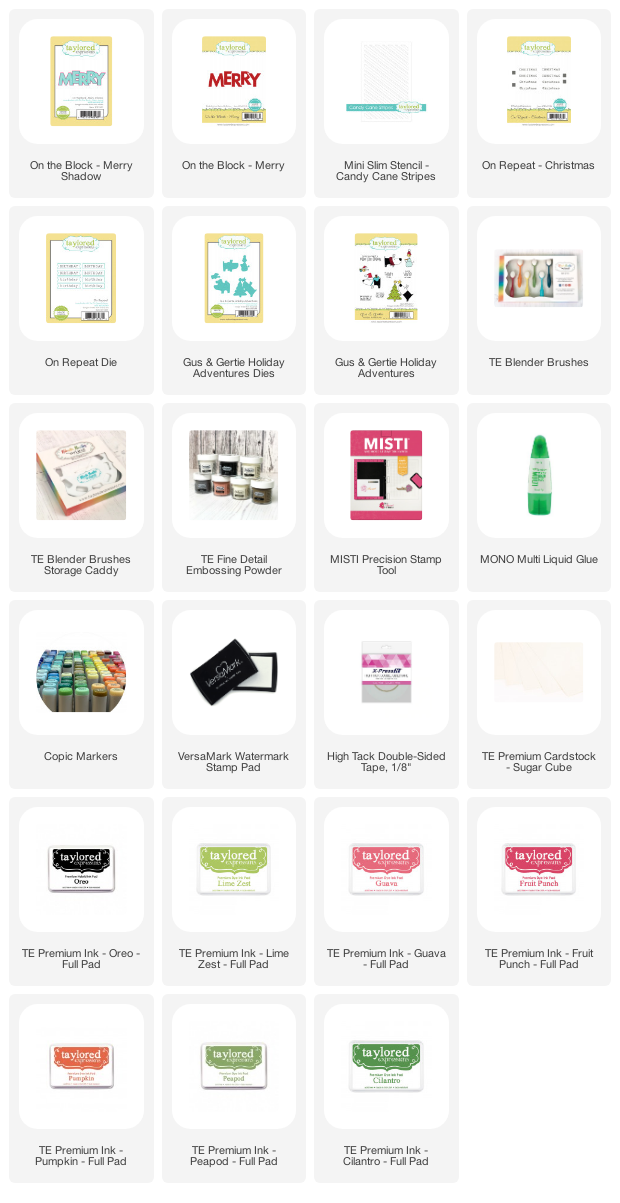
My first card uses a bunch of new products along with the new Gus and Gertie Christmas themed stamp set. I first stamped and colored multiple images from the stamp set using alcohol markers. I then added highlights and shadows using colored pencils and a white gel pen. For the word "Merry', I masked and stamped each letter in Fruit Punch, Pumpkin, Peapod, Cilantro and Lime Zest Ink. I added highlights and shadows to the words as well just like my stamped images. For the background, I used the newly released Candy Cane Stripes stencil and ink blended using Lime Zest and Guava. I then lightly ink blended on top using the same colors and added splatters using white paint. Although this stencil is meant for a mini slimline card, it's still great for A2 cards! I then finished my card by adding a 'Christmas' sentiment from the new on-repeat stamp set.


Supply List:


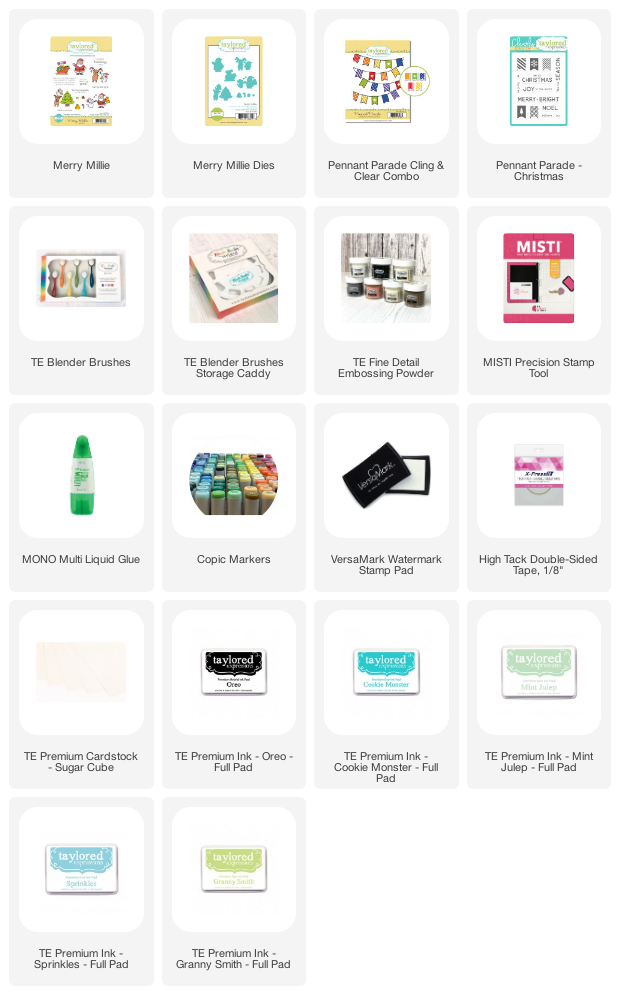
My next card shows you another way to use the Pennant Parade stamp set with a critter by stamping the top 3/4  of the card so that you have space at the bottom to add sentiments, critters etc. I stamped the banners using Sprinkles, Mint Julep and Granny Smith ink and ink blended the bottom half of the panel using Cookie Monster and Granny Smith. As always, I added splattered some white paint. I finished it off with a critter from the new Merry Millie stamp set and added a sentiment from Tag Team - Christmas to make a mini Christmas Party scene! 


Supply List:


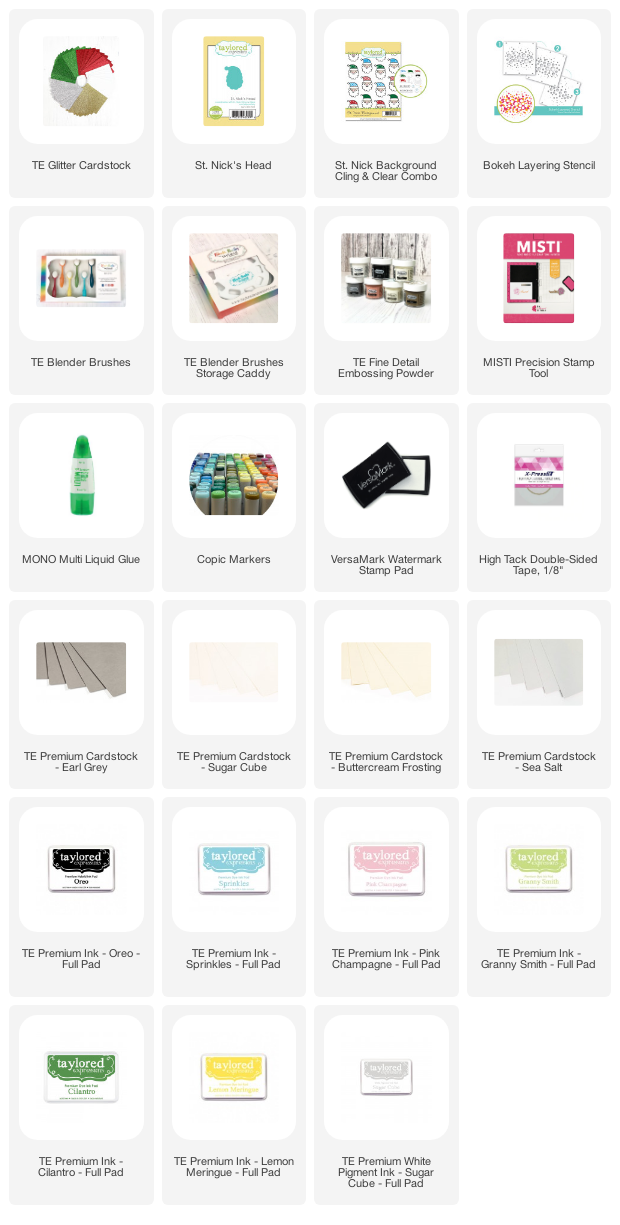
My next card is probably one of my favorites so far! I assembled the Santa Clauses from St Nick's Background Cling and Clear stamp set to form a Christmas tree. I added 'shadows' and a tree stump to the Santa Clauses using gold glitter cardstock. For the background, I ink blended Poblano Pepper and Cilantro inks and used the Bokeh Stencil with Sugar Cube, Granny Smith and Lemon Meringue inks. I stamped the caps using Sprinkles, Pink Champagne and Granny Smith and finished it off by adding some Gold Coast Nuvo drops. The sentiment was heat embossed using white embossing powder on watermelon cardstock.


Supply List:


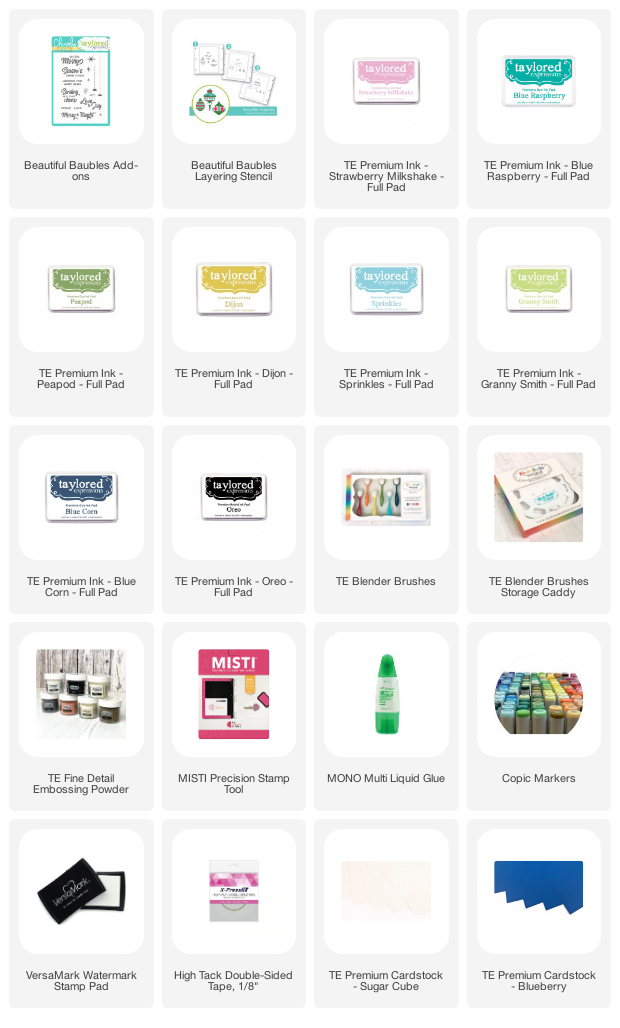
I love all things vintage and the new Beautiful Baubles stencil and stamp set is just gorgeous! I first stenciled the baubles on Sugar Cube cardstock using Strawberry Milkshake, Blue Raspberry, Peapod, Dijon, Sprinkles and Granny Smith inks. I then fuzzy cut and placed them on a Blueberry cardstock. I ink blended the edges of the cardstock using Bluecorn ink and added white and blue paint splatters. I then finished it off by heat embossing elements from the add on set.


Supply List:


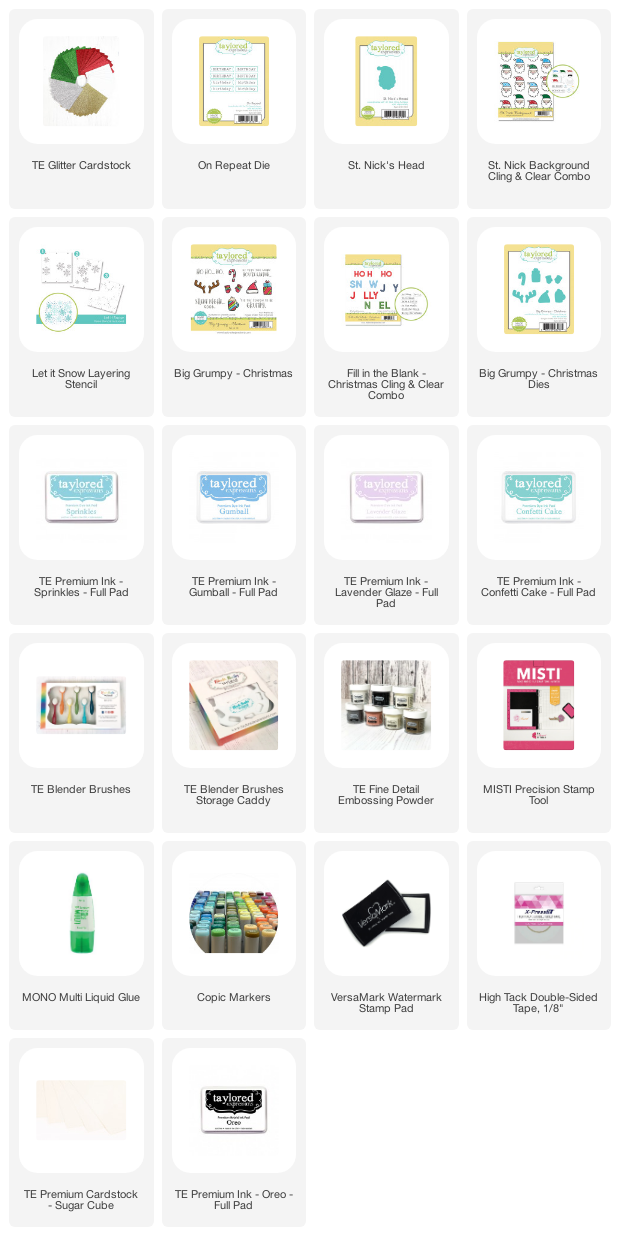
If you follow me on Instagram, you must know by now that I am a huge fan of typography! Imagine my excitement when I saw the Fill in the Blanks - Christmas stamp set! It's something that I would totally do :) I first ink blended the top and bottom edges of Sugar Cube cardstock using Sprinkles and Lavender Glaze using the Let it Snow Layering stencil. I wanted a light Teal color for the letters so I first stamped them in Gumball and then stamped again using Confetti Cake. I fuzzy cut the alphabets and then placed them on the ink blended panel along with a Santa Claus from St Nick's Background stamp and some elements from Big Grumpy - Christmas. I added 'shadows' using silver cardstock. I finished it off with a sentiment from On-Repeat Christmas.

Supply List:


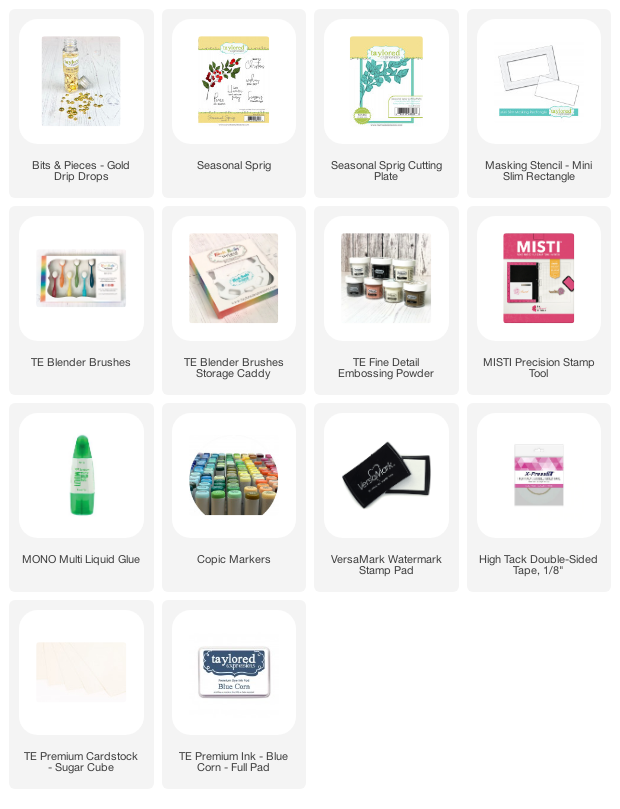
My last card is simple to recreate and uses the new mini slimline masking stencil and Seasonal Sprig stamp set. I ink blended the center portion of the card using Poblano Pepper and Bluecorn and added elements from the Seasonal Sprig stamp set. I added paint splatters and added some gold drip drops to finish off the card! 


Supply List:

Here is an extra card using a bunch of different products from the new release!


That's all I have got to share! I hope you enjoyed this release as much as I did. Be sure to checkout what the rest of the team created!

Thanks,
Kavya 


Share
Tweet
Pin
Share
1 comments
Newer Posts
Older Posts

About me


Hello! I am Kavya. Welcome to my blog where I share my love for all things papercrafting and cardmaking. I am excited that you decided to stop by and look around.

Follow me on Social Media
  • Instagram
  • YouTube

Cards by Brand

Alex Syberia altenew Heffy Doodle Mama Elephant MFT newton's nook Pear Blossom Press Reverse Confetti SugarPea Designs Sunny Studio Stamps Taylored Expressions Wow Embossing

Blog Archive

  • ▼  2024 (11)
    • ▼  October (1)
      • Bear Hugs ft Taylored Expressions
    • ►  September (1)
    • ►  August (1)
    • ►  July (1)
    • ►  June (1)
    • ►  May (2)
    • ►  April (1)
    • ►  March (1)
    • ►  February (1)
    • ►  January (1)
  • ►  2023 (15)
    • ►  December (1)
    • ►  November (2)
    • ►  September (3)
    • ►  August (1)
    • ►  July (1)
    • ►  June (1)
    • ►  May (1)
    • ►  April (2)
    • ►  March (1)
    • ►  February (1)
    • ►  January (1)
  • ►  2022 (34)
    • ►  November (4)
    • ►  October (1)
    • ►  September (3)
    • ►  August (1)
    • ►  July (1)
    • ►  June (5)
    • ►  May (5)
    • ►  April (2)
    • ►  March (5)
    • ►  February (3)
    • ►  January (4)
  • ►  2021 (47)
    • ►  December (1)
    • ►  October (3)
    • ►  September (6)
    • ►  August (5)
    • ►  July (2)
    • ►  June (4)
    • ►  May (3)
    • ►  April (4)
    • ►  March (4)
    • ►  February (6)
    • ►  January (9)
  • ►  2020 (28)
    • ►  December (7)
    • ►  November (7)
    • ►  October (2)
    • ►  September (11)
    • ►  August (1)

Popular Posts

  • Sunny Studio Stamps 6th Birthday Blog Hop!
      Hi folks,  Welcome to the Sunny Studio Stamps 6th Birthday Blog Hop! This new release is just so much fun! If you love Christmas.. this on...
  • Sunny Studio Stamps 7th Birthday Blog Hop
      Hi folks,  I am back on the blog with another fun card! I know it's been weeks since I have posted but life's been crazy :) But, I...
  • Heffy Doodle + Sunny Studio Stamps blog hop!
    Hi folks,  Welcome to the Heffy Doodle and Sunny Studio Stamps Collaboration Blog Hop! Design Team members from both companies are sharing i...
  • New Gel Printing Kit from TE
      Hi folks,  TE has a new kit and it's all about gel printing! I have never tried it before so I was excited to get my hands on it and t...
  • Go Cray-zy! It’s the Pear Blossom + Heffy Doodle blog hop!!
      Hi folks,  Today, we’re kicking off a CRAFTY Collaboration Blog Hop with Pear Blossom Press and Heffy Doodle !  Come hop along with us and...
  • You are my Best-Tea! : MFT Dec Release!
    Hi folks! I am super excited to be a part of MFT's December release! This new release has so many adorable and versatile products just l...
  • Toy Story ft. MFT Stamps!
    Hi folks,  I am back on the blog with another fun project for MFT’s Cardmaking Superstar competition. I always love taking part in every yea...
  • Christmas Gifting Kit from TE!
      Hi folks,  TE has a new Christmas Gifting Kit that has many unique products that make packaging and decoration super adorable! As always, ...
  • TE - Happy Father's Day!
      Hi folks,  I am back on the blog with another fun release from Taylored Expressions - Father's Day! I love this release... it's so...
  • Mass produce Christmas cards easily with TE!
      Hi folks,  I am back on the blog with another fun release from TE! I love how the new Create in Quad stencils make it super easy to mass p...

Followers

Check out more cards on my Instagram here Watch Cardmaking videos on my YouTube channel here

Created with by BeautyTemplates | Distributed By Gooyaabi Templates